The right tool makes all the difference — not just in the result, but in the enjoyment of getting there. Here’s what I’ve found worth having on the workbench.
Cutting Edge Technology
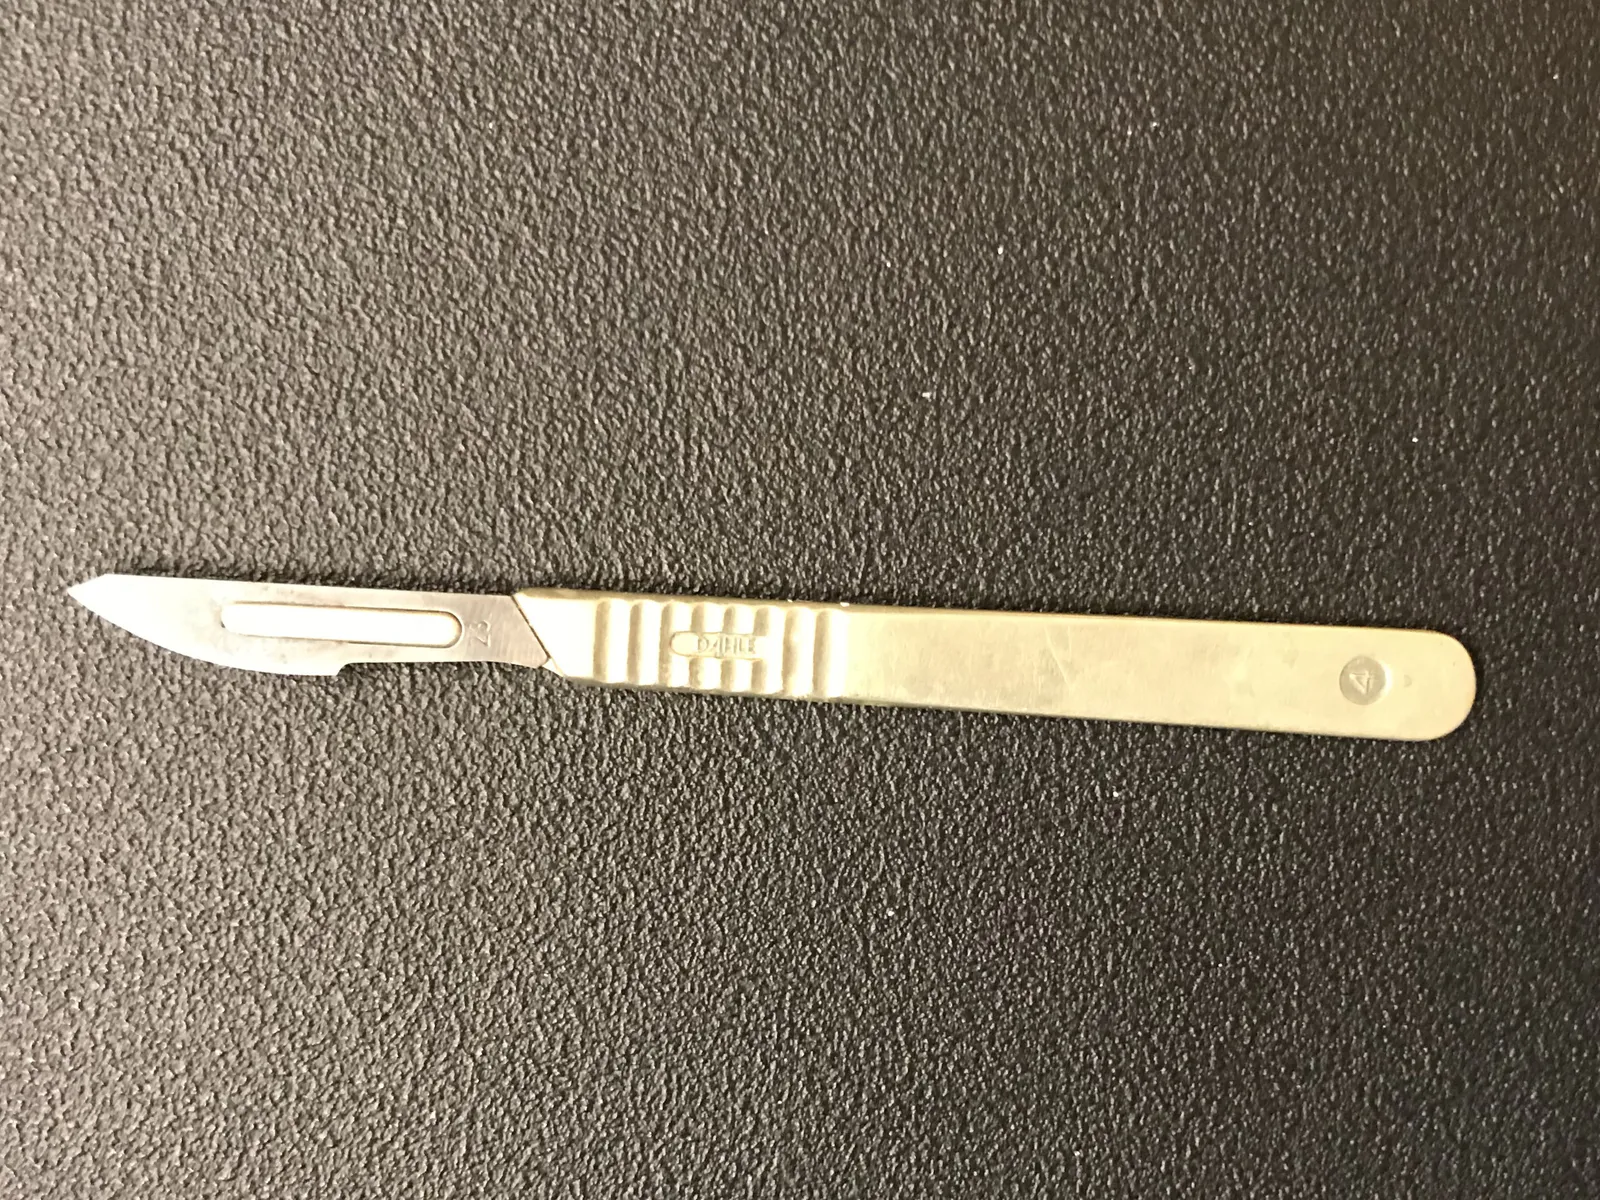
The knife
The knife — or better yet, a scalpel — is one of the most essential tools on your workbench, but it demands respect. It's easy to cut yourself, and equally easy to remove more material than you intended. That said, it's indispensable.
As my skills developed I replaced it with more specialised tools for many tasks — but there's always a scalpel within reach. Sometimes you just need to clean up something quickly in a less delicate spot, or nudge a stubborn decal into position.
As my skills developed I replaced it with more specialised tools for many tasks — but there's always a scalpel within reach. Sometimes you just need to clean up something quickly in a less delicate spot, or nudge a stubborn decal into position.
The cutter
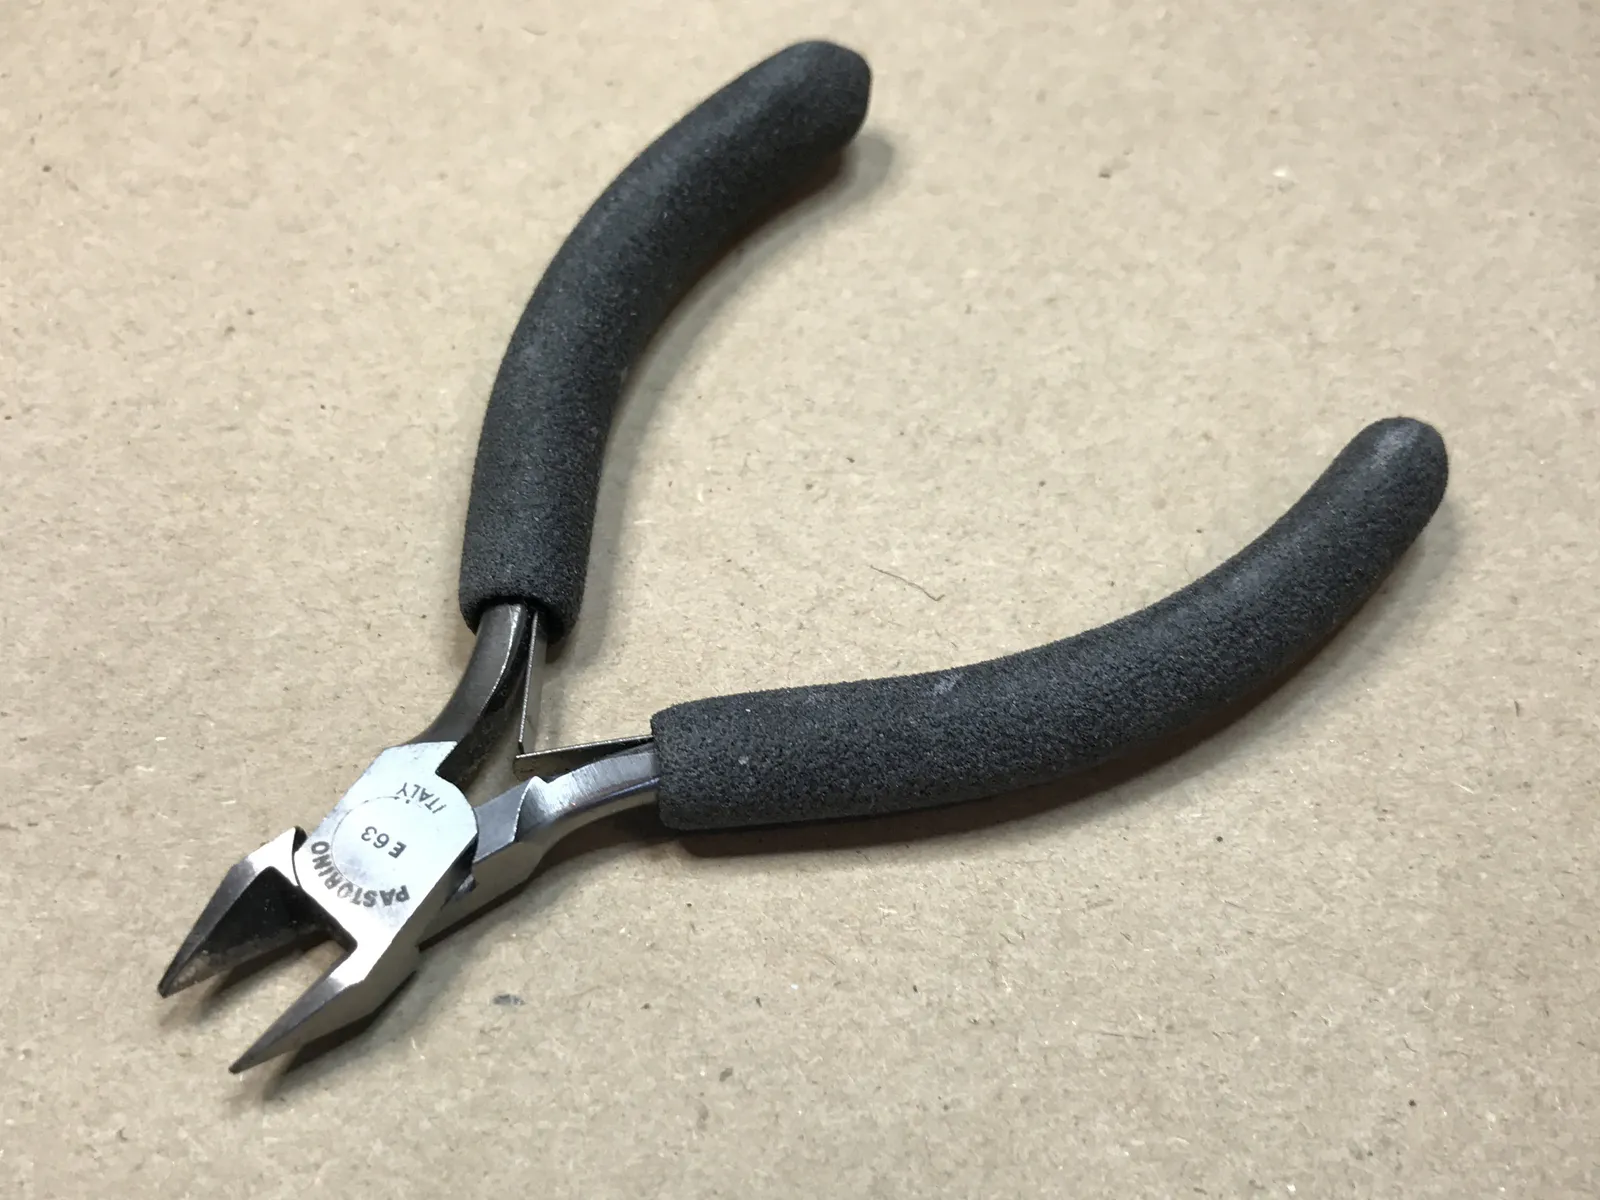
I'll admit it — as a kid I used to bend, twist and wrench parts off the sprue. It left small but maddening damage on the parts themselves. Cutting them off with a knife was an improvement, though still easy to overdo. What took me far too long to figure out was that a proper sprue cutter is simply the right tool for the job.
With the flat side of the cutter facing the part, it leaves an almost negligible mark — one that's easily cleaned up afterwards. It's one of those tools that makes you wonder how you ever managed without it.
With the flat side of the cutter facing the part, it leaves an almost negligible mark — one that's easily cleaned up afterwards. It's one of those tools that makes you wonder how you ever managed without it.
The scissor
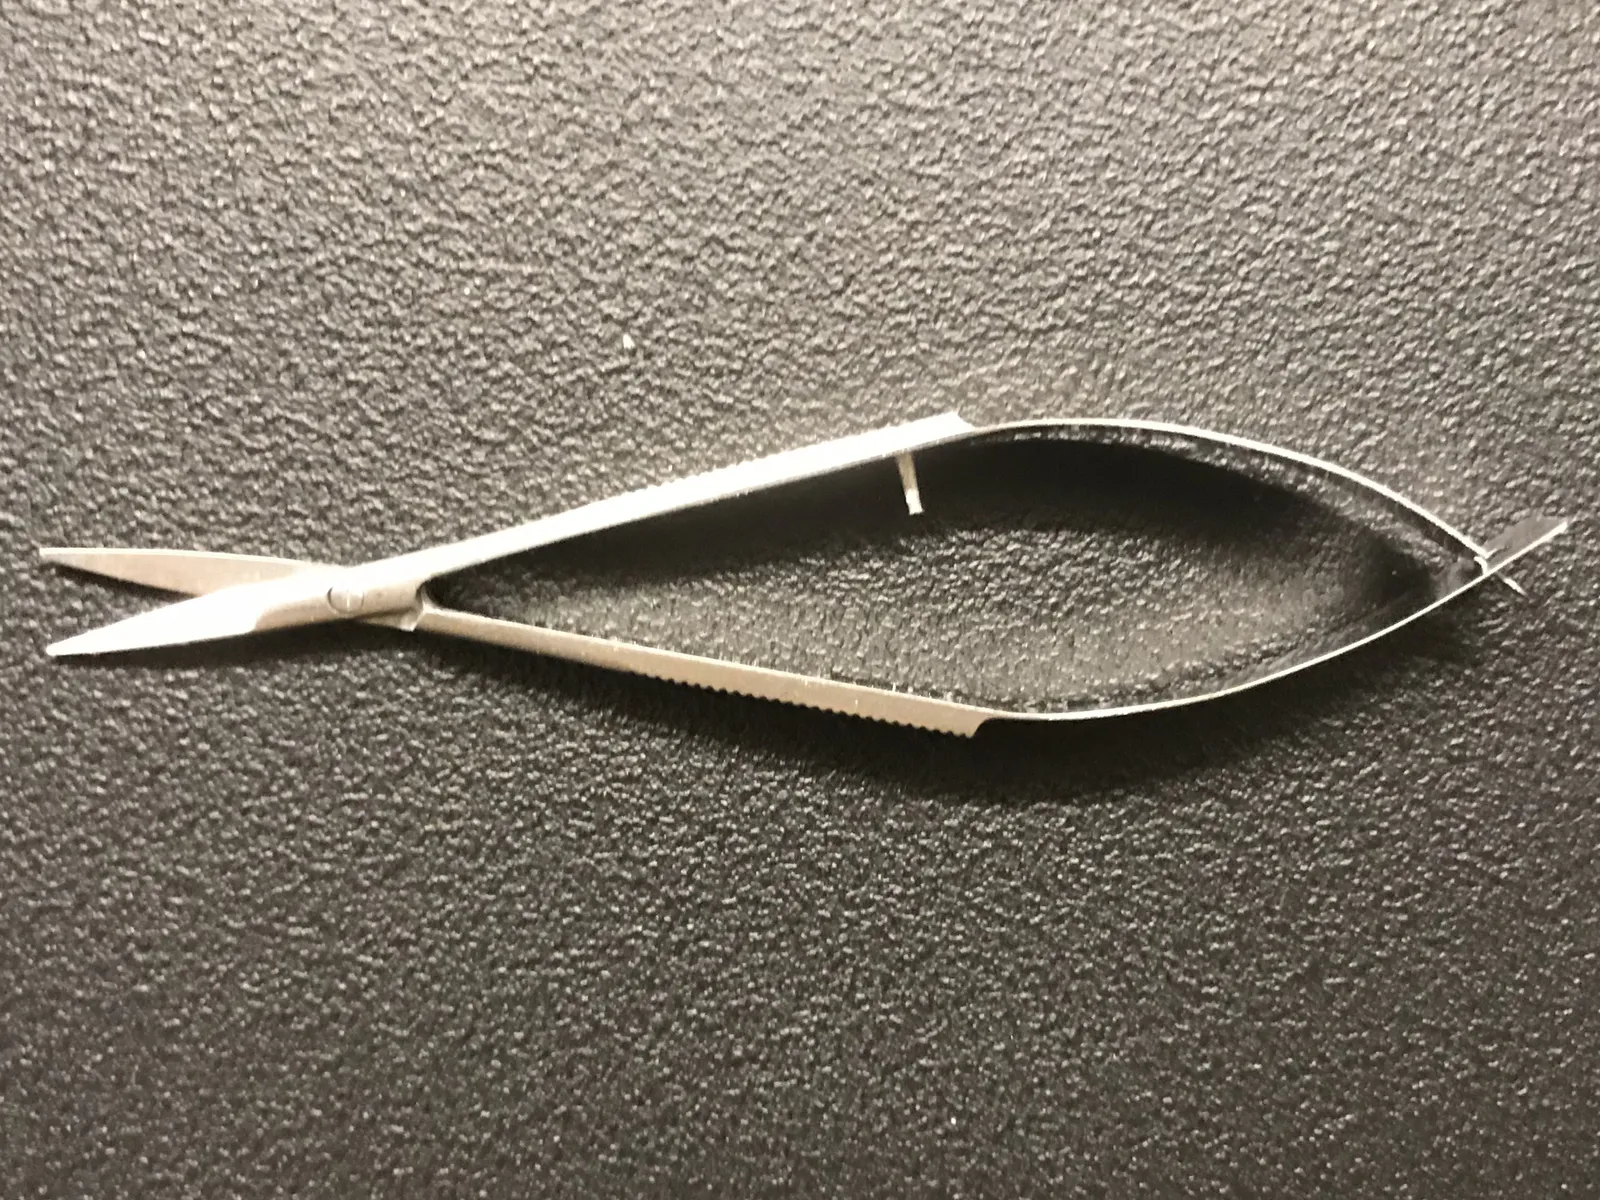
A pair of scissors is always handy — for cutting decals from the sheet, for example. But the one I reach for most is a small, pointed pair from Italeri, made for handling photo-etched metal parts. These tiny components can be very difficult to get at with a sprue cutter, and the fine tip gets into exactly the right place for a clean cut.
The tweezers
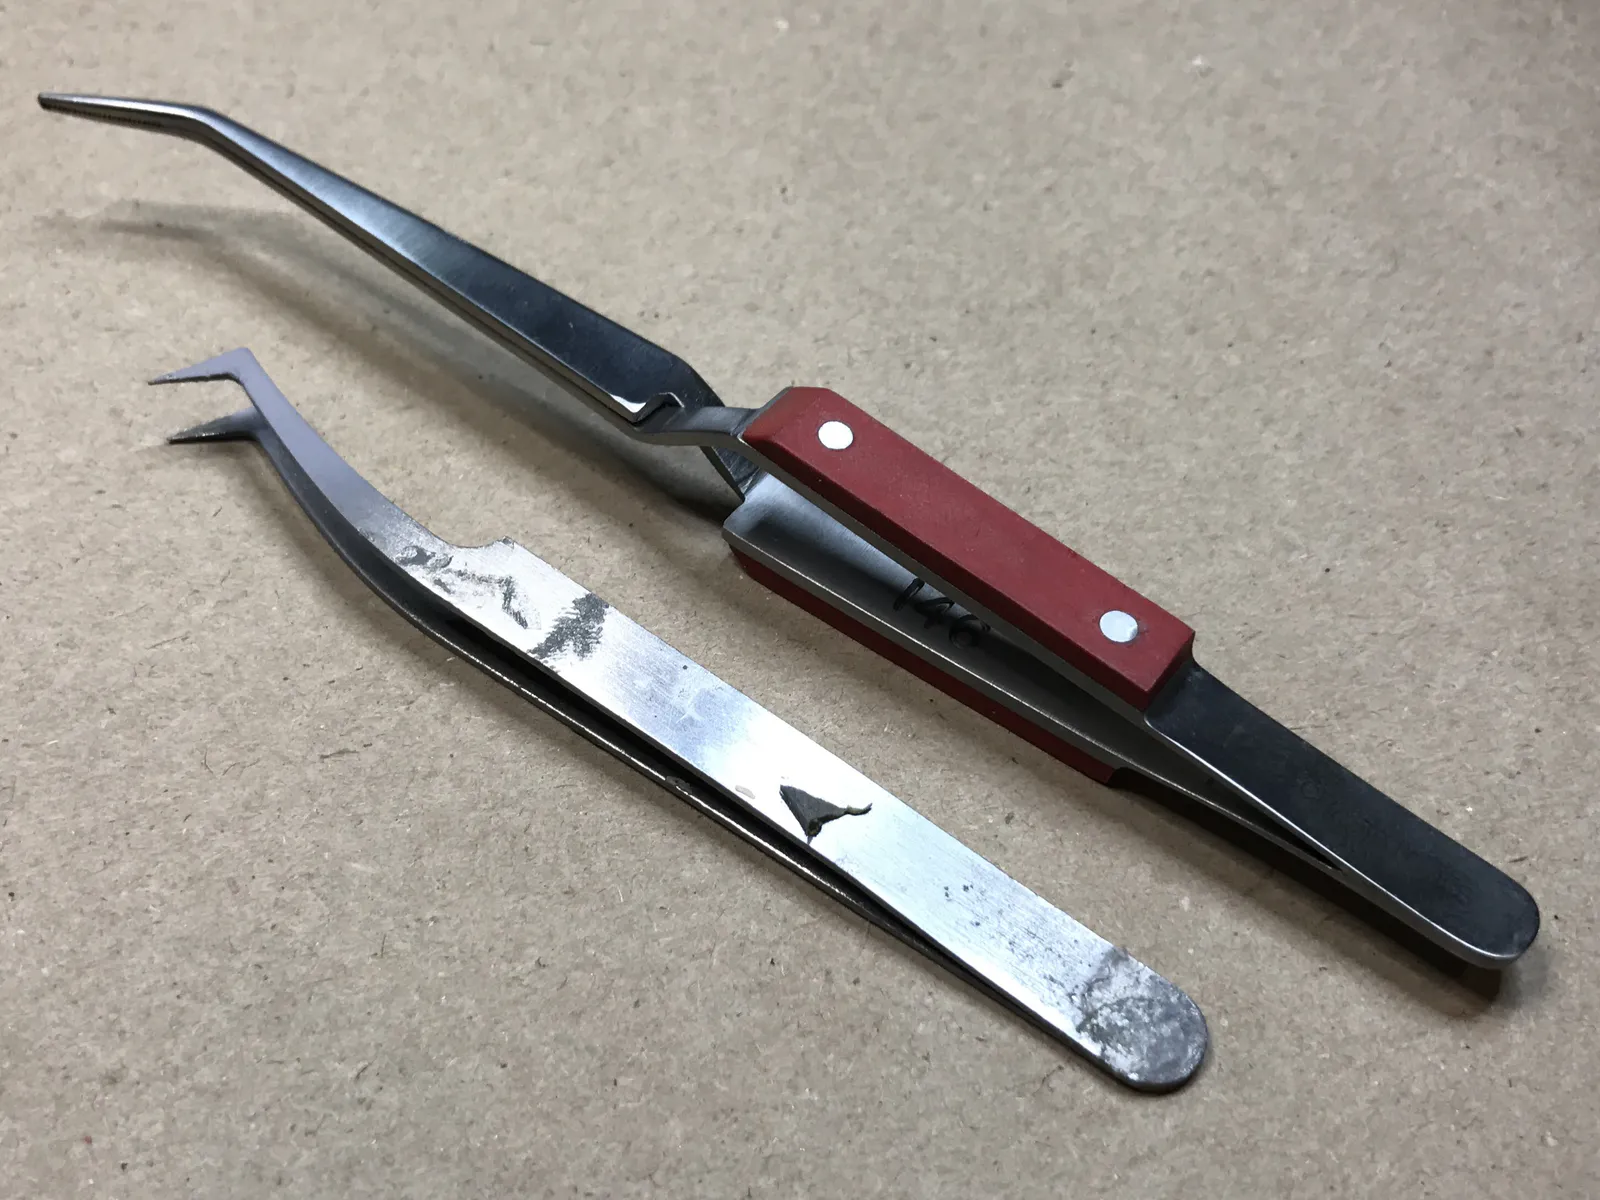
This is another truly essential tool. Most kits contain remarkably small parts, and more often than not they need to be fitted into tight spaces where your fingers simply won't do. Handling tweezers takes a little practice — you need enough pressure to hold the part, but too much and it will snap free and disappear across the room to somewhere only the vacuum cleaner will find it.
There's a wide range available and it's personal what you prefer. I've found that angled tips work best, especially when fitting things into confined spaces. I also keep a self-closing pair — the kind that requires pressure to open rather than to close — for when I need to keep track of a small part without holding the tweezers constantly.
There's a wide range available and it's personal what you prefer. I've found that angled tips work best, especially when fitting things into confined spaces. I also keep a self-closing pair — the kind that requires pressure to open rather than to close — for when I need to keep track of a small part without holding the tweezers constantly.
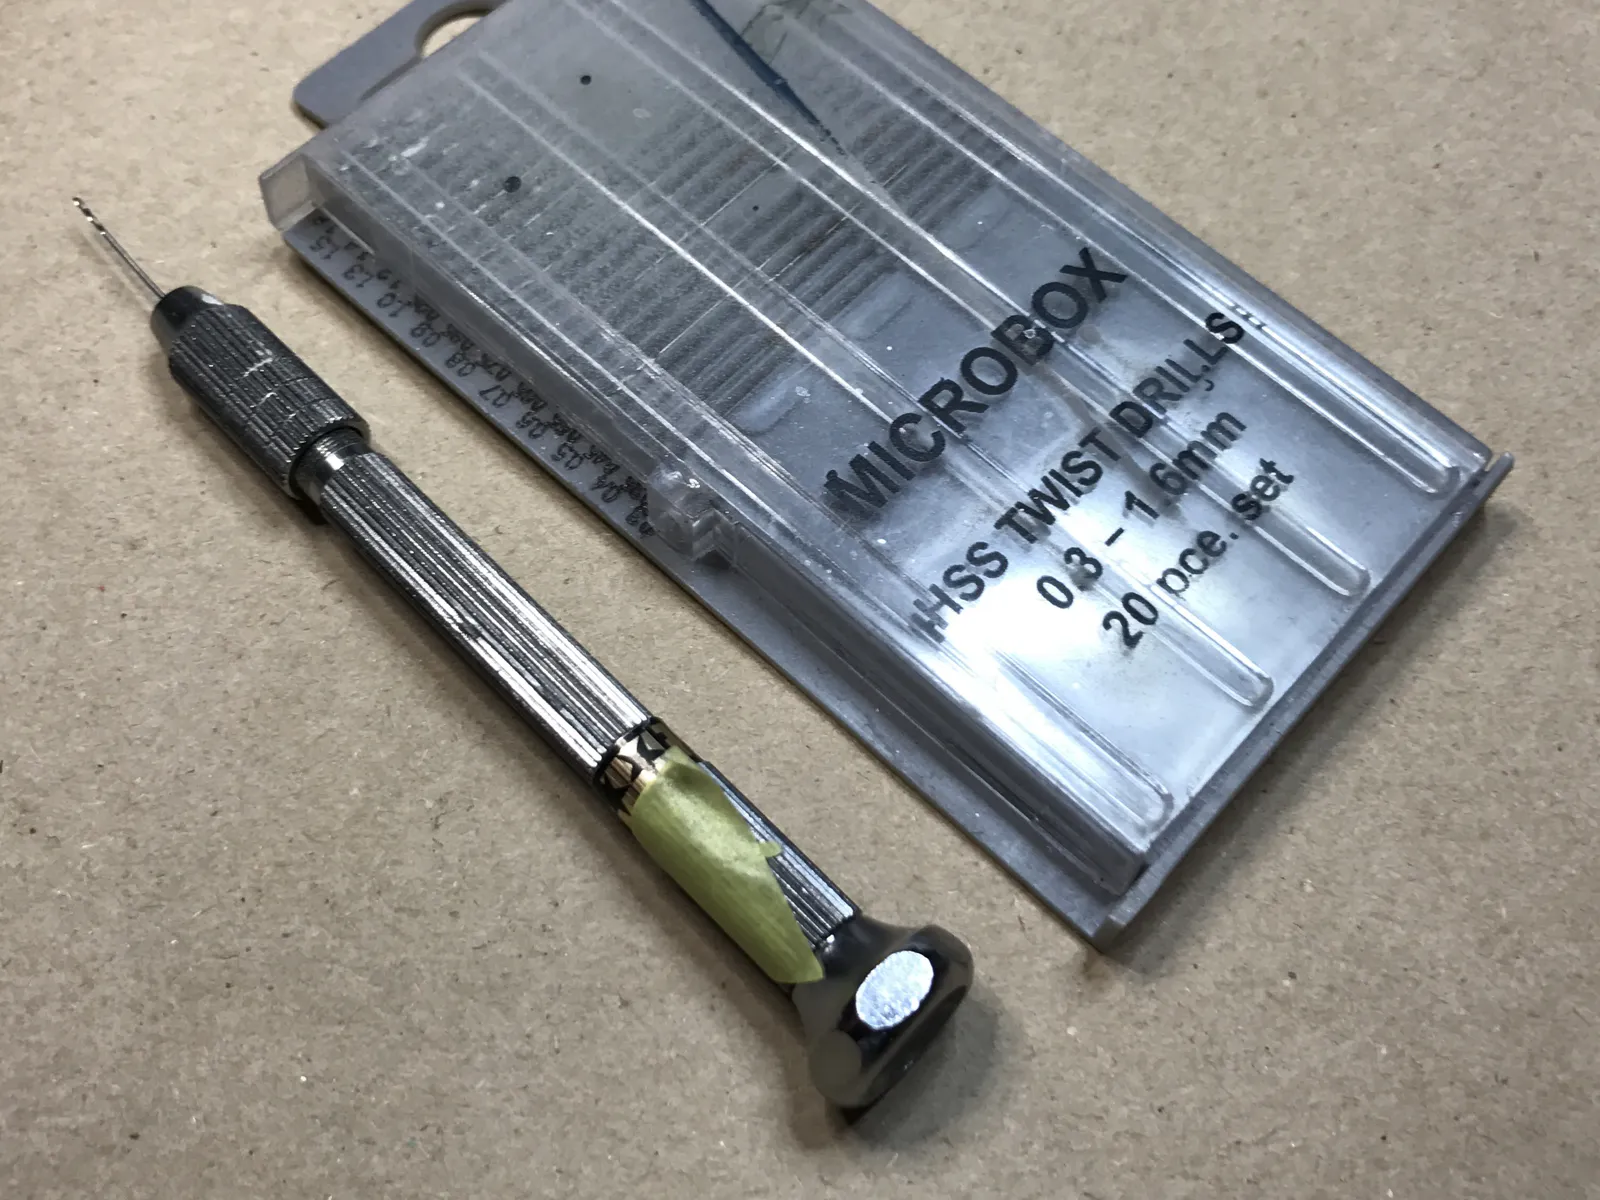
The drill
A small hobby drill with a set of bits in different sizes is invaluable when a hole is needed. Many kits have options that require you to open up holes for parts to fit into later, and I used to do this with a needle or knife — which is neither precise nor kind to the plastic. The moment I got a proper hobby drill I couldn't understand why I hadn't bought one sooner.
A few things worth knowing: it's better to start drilling from the visible side of the part, as the entry point comes out neater than the exit. If there's a pre-marked countersink on the inside, start there instead — tidying an exit hole is easier than fixing a hole in the wrong place. And if there's no guide mark at all, make a small indent with a needle first. Without it, the drill will slide and you'll end up somewhere you didn't intend.
A few things worth knowing: it's better to start drilling from the visible side of the part, as the entry point comes out neater than the exit. If there's a pre-marked countersink on the inside, start there instead — tidying an exit hole is easier than fixing a hole in the wrong place. And if there's no guide mark at all, make a small indent with a needle first. Without it, the drill will slide and you'll end up somewhere you didn't intend.
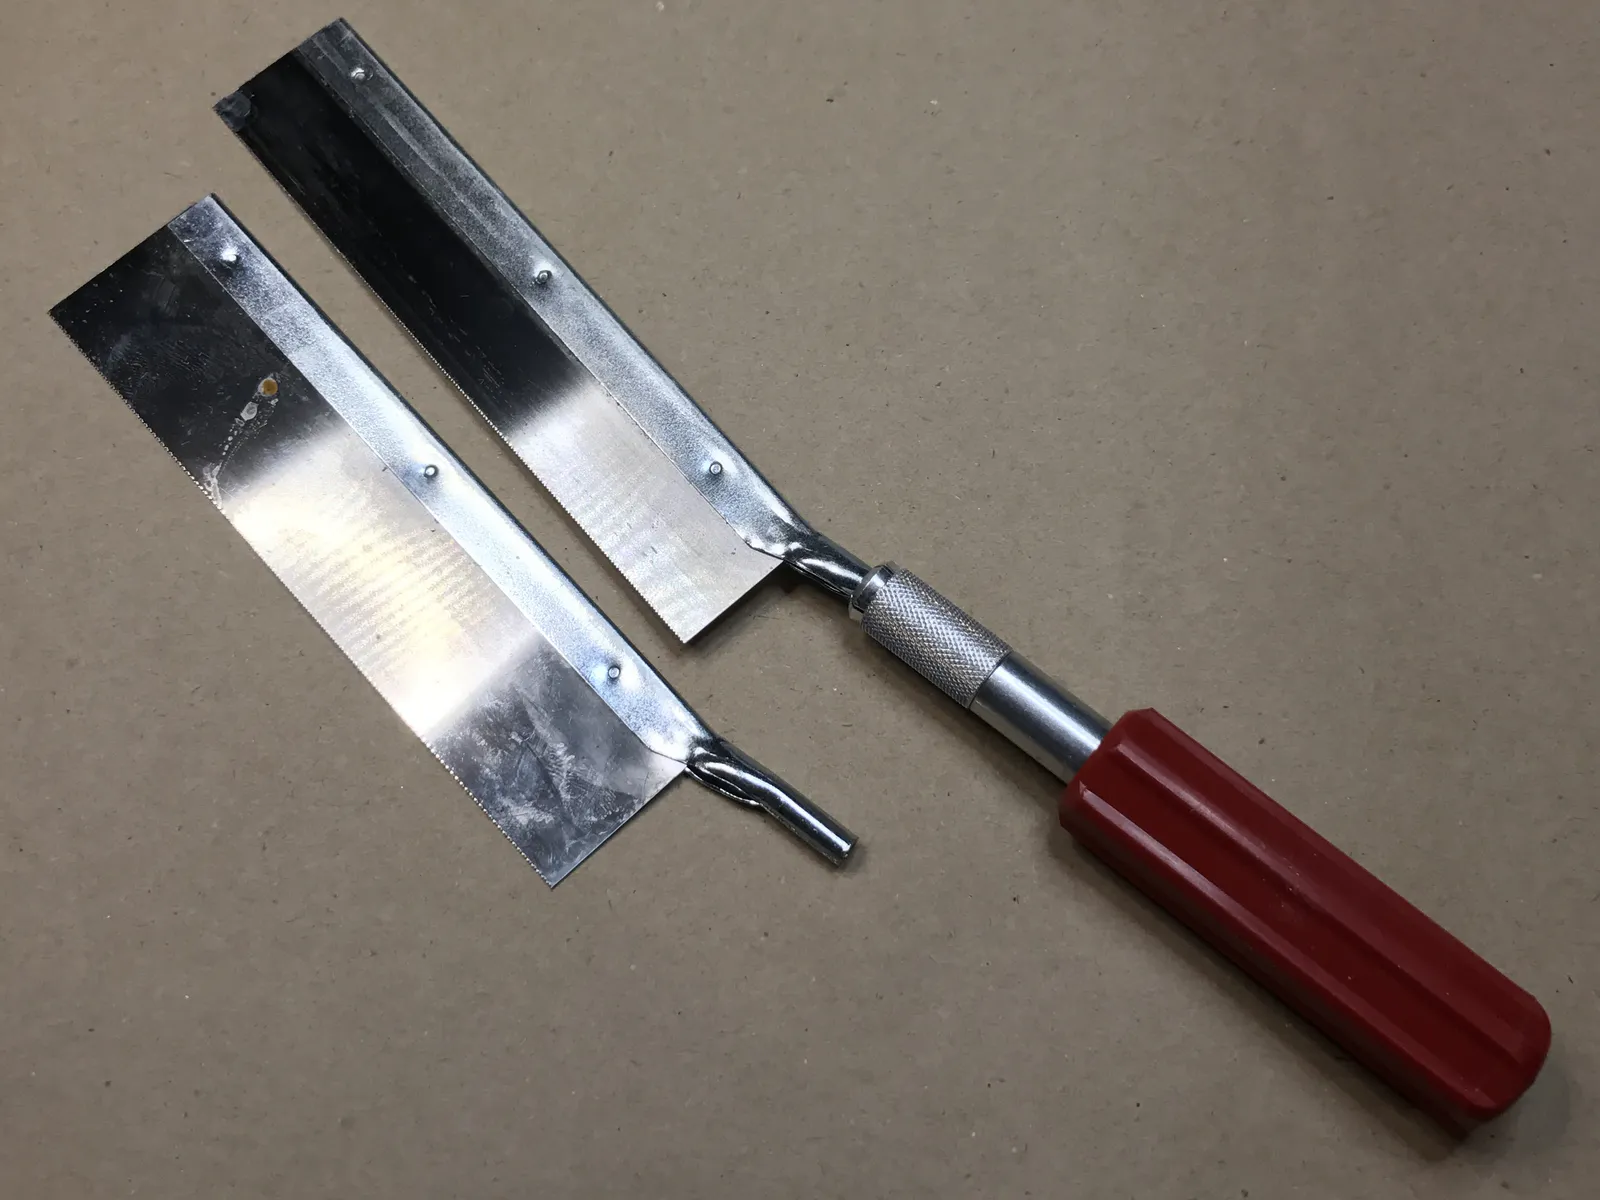
The saw
A saw might seem like an odd addition to the hobby bench, but there are situations where nothing else will do. Resin detail parts, for example, aren't delivered on sprues — they come moulded with large blocks of excess resin that need to be removed. Trying to cut through these with a knife is frustrating and rarely straight. A hobby saw gives you a clean, controlled cut.
I use two kinds. A larger one for straight cuts through bigger pieces of resin or plastic, and a smaller one with a thin blade — the kind that fits into a standard hobby knife handle. The smaller saw is perfect for delicate work, like repositioning a rudder or separating parts that need a precise cut without collateral damage.
I use two kinds. A larger one for straight cuts through bigger pieces of resin or plastic, and a smaller one with a thin blade — the kind that fits into a standard hobby knife handle. The smaller saw is perfect for delicate work, like repositioning a rudder or separating parts that need a precise cut without collateral damage.
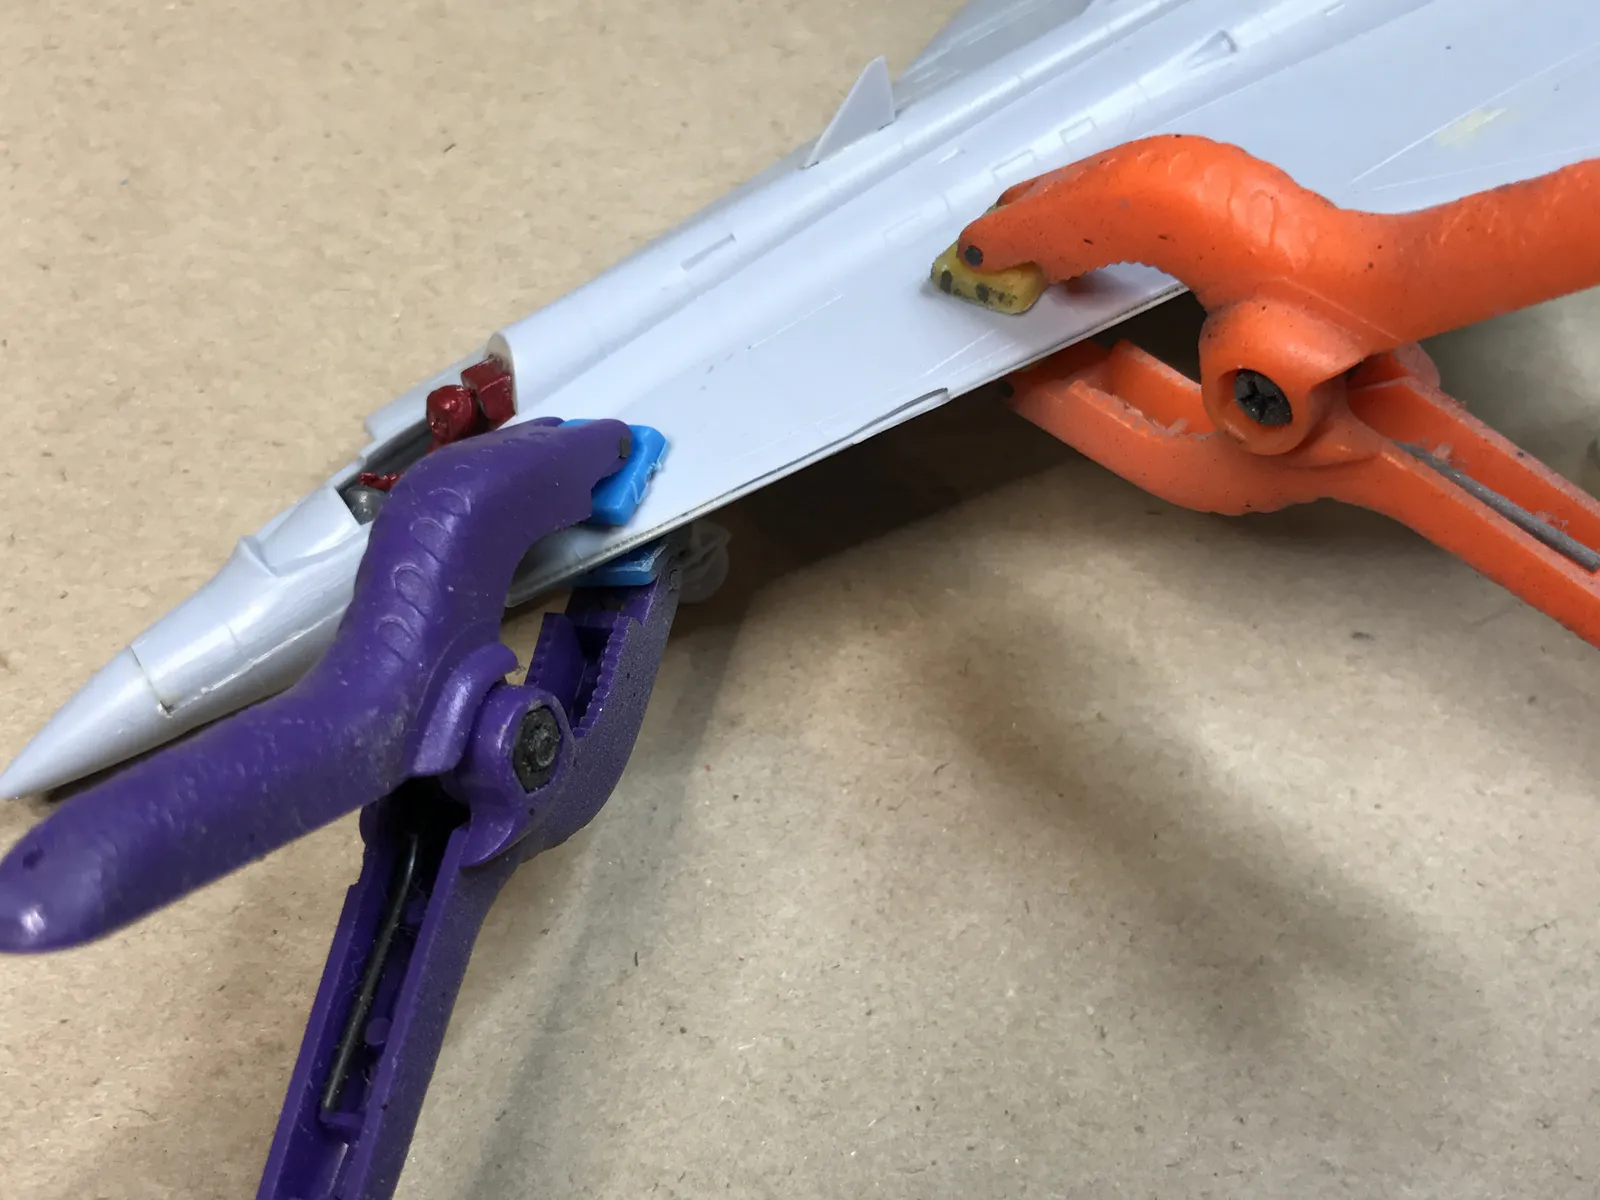
The clamps and the rubber bands
When gluing parts together, they have a tendency to spring apart while the cement does its work — and you don't always want to sit there holding them for ten minutes. Clamps and rubber bands solve this, and they work in usefully different ways.
Rubber bands apply even pressure around a joint, making them perfect for holding a fuselage together. Clamps are better for concentrated pressure on flat surfaces like wings. Both are worth having. Rubber bands you can pick up almost anywhere, and clamps are available at any well-stocked hobby shop.
Rubber bands apply even pressure around a joint, making them perfect for holding a fuselage together. Clamps are better for concentrated pressure on flat surfaces like wings. Both are worth having. Rubber bands you can pick up almost anywhere, and clamps are available at any well-stocked hobby shop.
Get Your Things Together
Getting parts to stay where you put them is one of the fundamental challenges of the hobby. The good news is that there’s a glue for every situation — once you know which one to reach for.
The poly cement
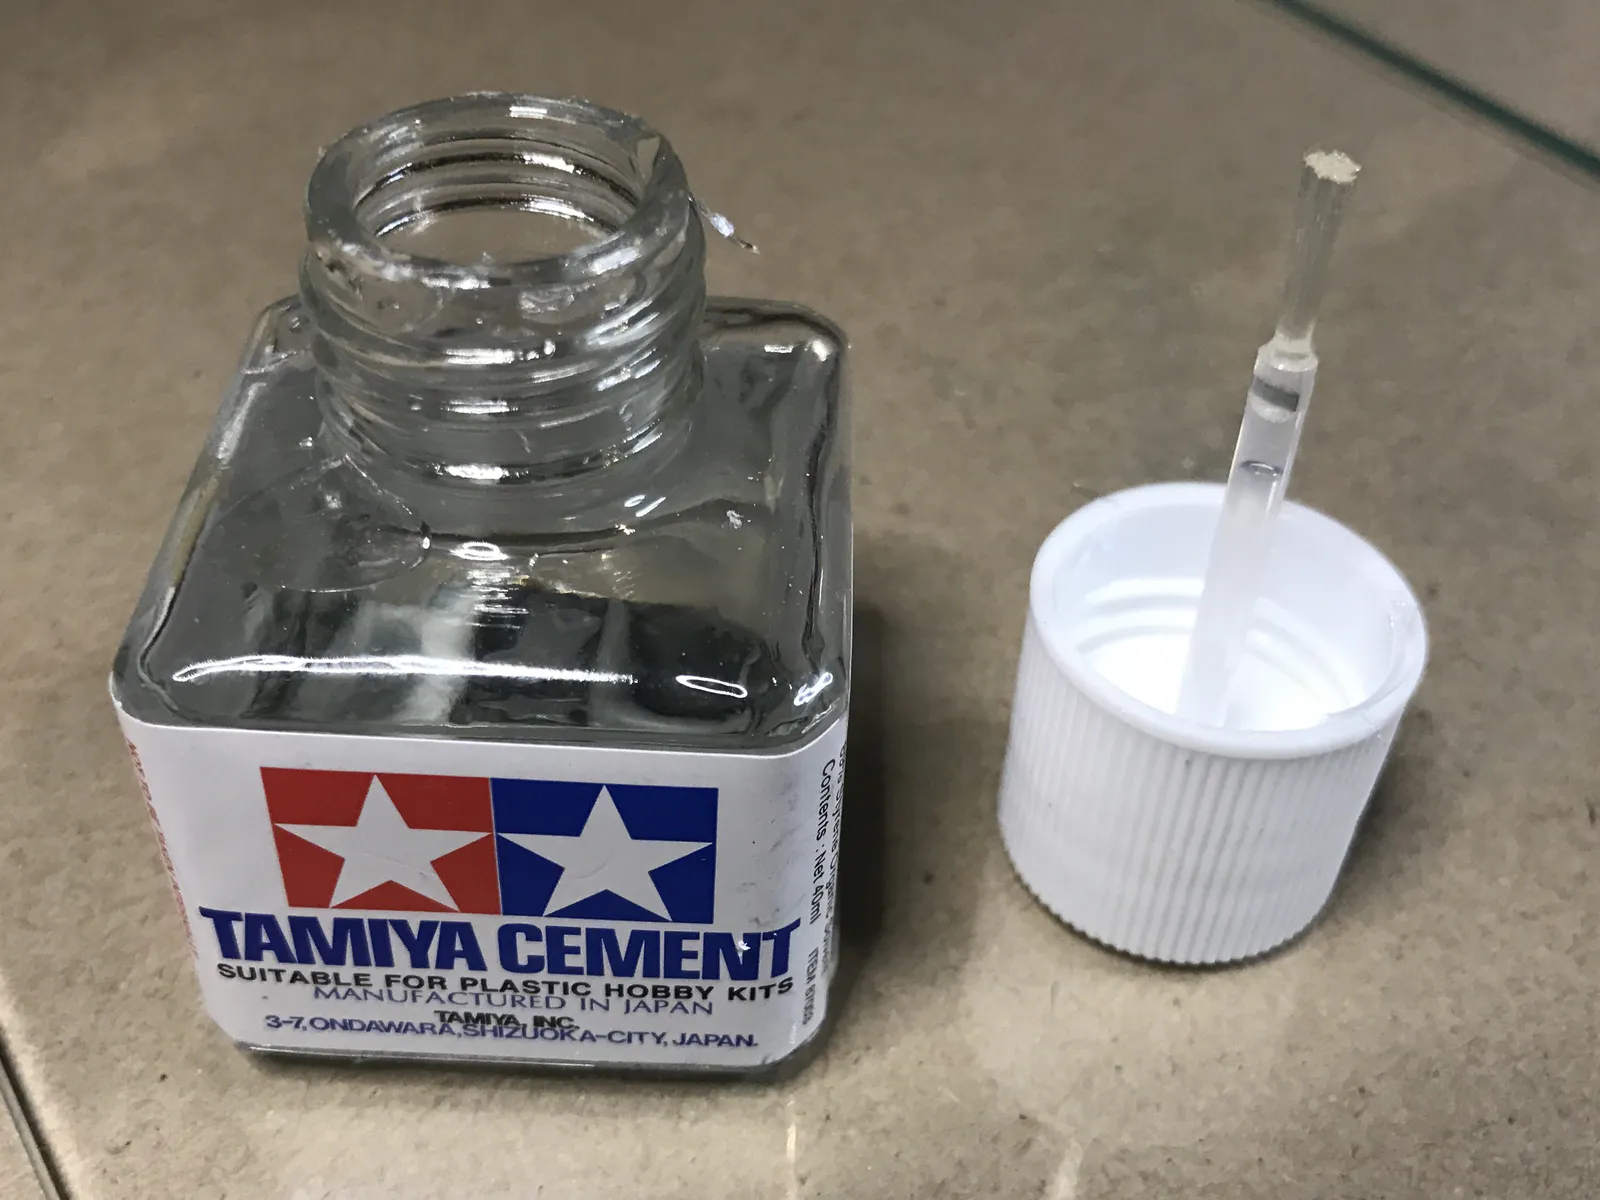
The most common glue for plastic models is poly cement — a solvent-based compound that works by actually welding the plastic together rather than just sticking it. It's effective, but it has its quirks.
The main issue with tube-based cement is that it's difficult to control how much comes out. Too much and you risk deforming the plastic, leaving a joint that takes forever to harden and a mess that's hard to clean up. Some manufacturers sell it in bottles with a fine applicator instead, which is a significant improvement. Whichever form you use, apply sparingly — any excess in the wrong place will leave marks that are very difficult to remove.
The main issue with tube-based cement is that it's difficult to control how much comes out. Too much and you risk deforming the plastic, leaving a joint that takes forever to harden and a mess that's hard to clean up. Some manufacturers sell it in bottles with a fine applicator instead, which is a significant improvement. Whichever form you use, apply sparingly — any excess in the wrong place will leave marks that are very difficult to remove.
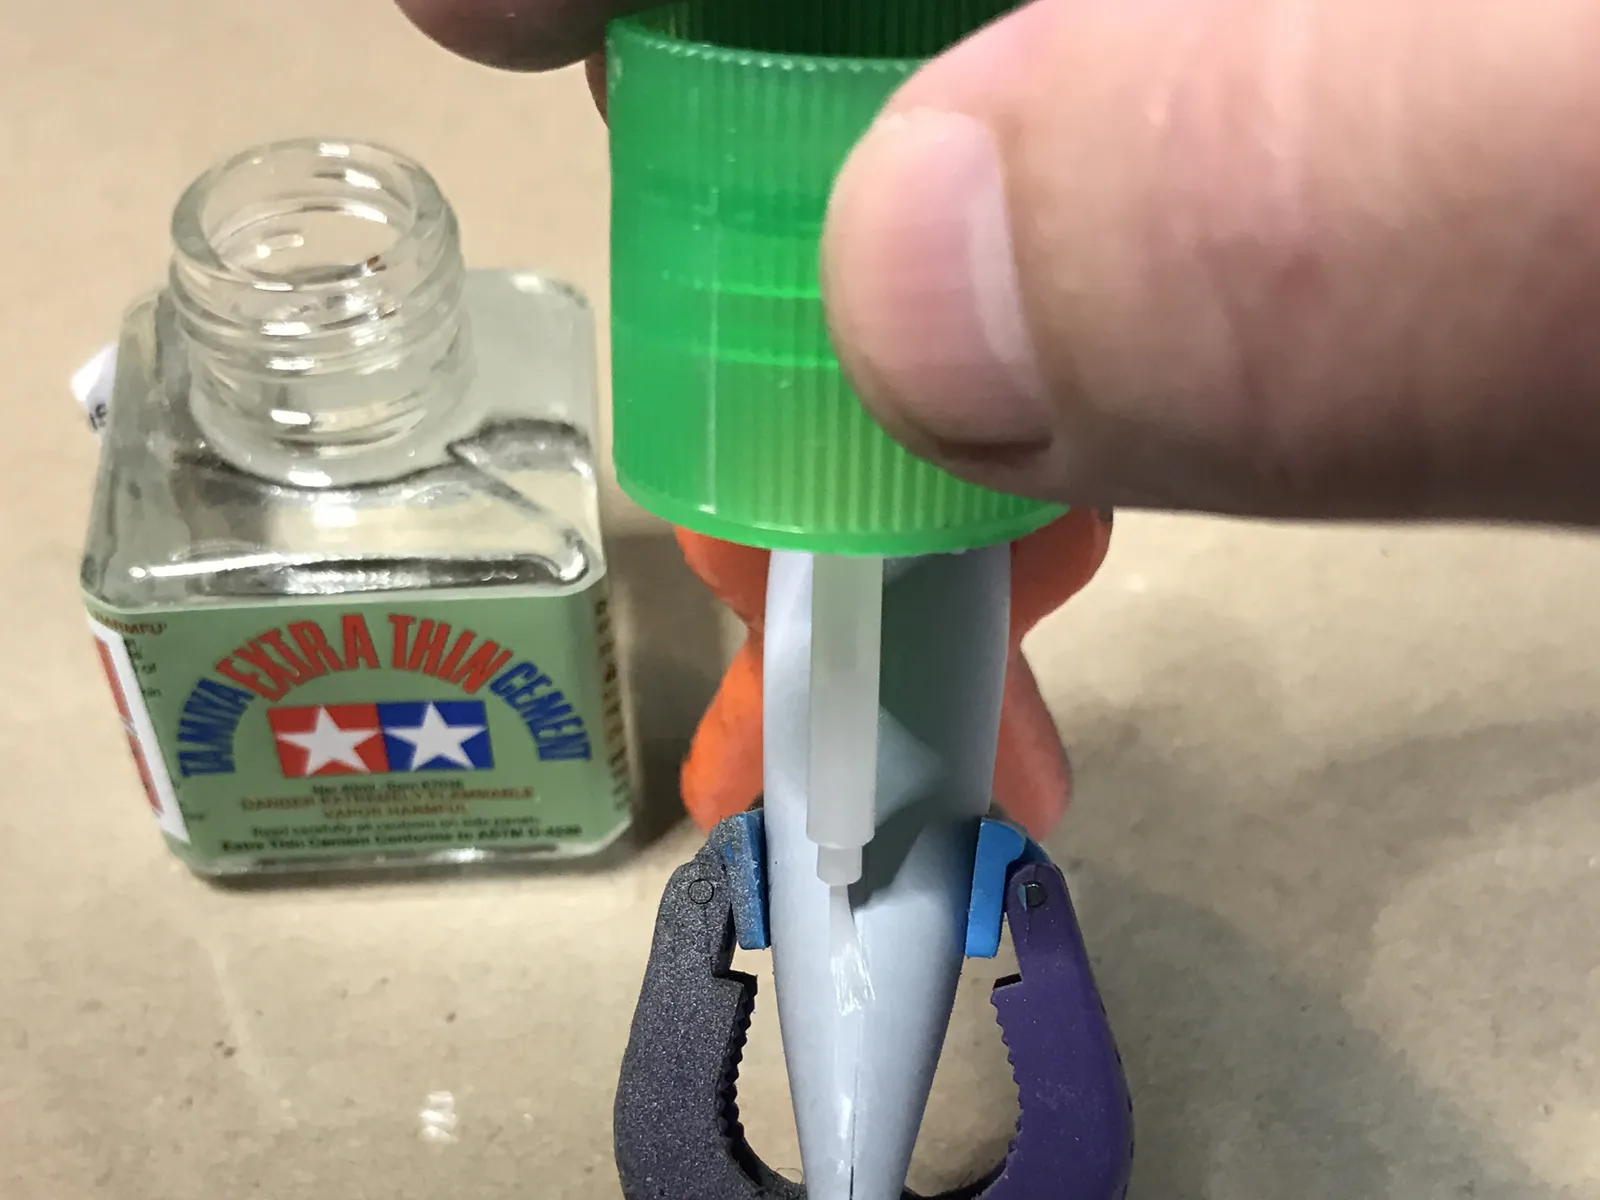
Extra Thin Cement
This one changed everything for me. When I first got it I couldn't make it work — it kept drying before I had the parts together. The reason was that I was using it the wrong way.
The trick is to reverse the process entirely. Press the parts together first, then apply the cement along the joint with the brush. The capillary action does the rest, drawing the cement into the join and welding it from the inside. Because it's so thin it leaves no marks on the outside either.
I've found it particularly useful for clear parts like canopies and windows. Place the part, touch the brush to the joint, and it holds — with minimal risk of clouding the plastic. That said, I still keep regular cement on hand for details and situations where it's difficult to hold parts in exactly the right position while applying.
The CA glue
Not everything on a plastic kit is plastic. Detail parts — whether included in the kit or bought separately — are often made of metal or resin, and poly cement simply won't bond these materials. That's where CA glue comes in. You probably know it better as super glue.
It comes in different viscosities. Thin CA dries almost instantly, while thicker variants give you a few extra seconds to adjust the parts before they set. Either way, work carefully — this stuff doesn't forgive hesitation. And whatever you do, don't touch your face while it's on your fingers.
It comes in different viscosities. Thin CA dries almost instantly, while thicker variants give you a few extra seconds to adjust the parts before they set. Either way, work carefully — this stuff doesn't forgive hesitation. And whatever you do, don't touch your face while it's on your fingers.

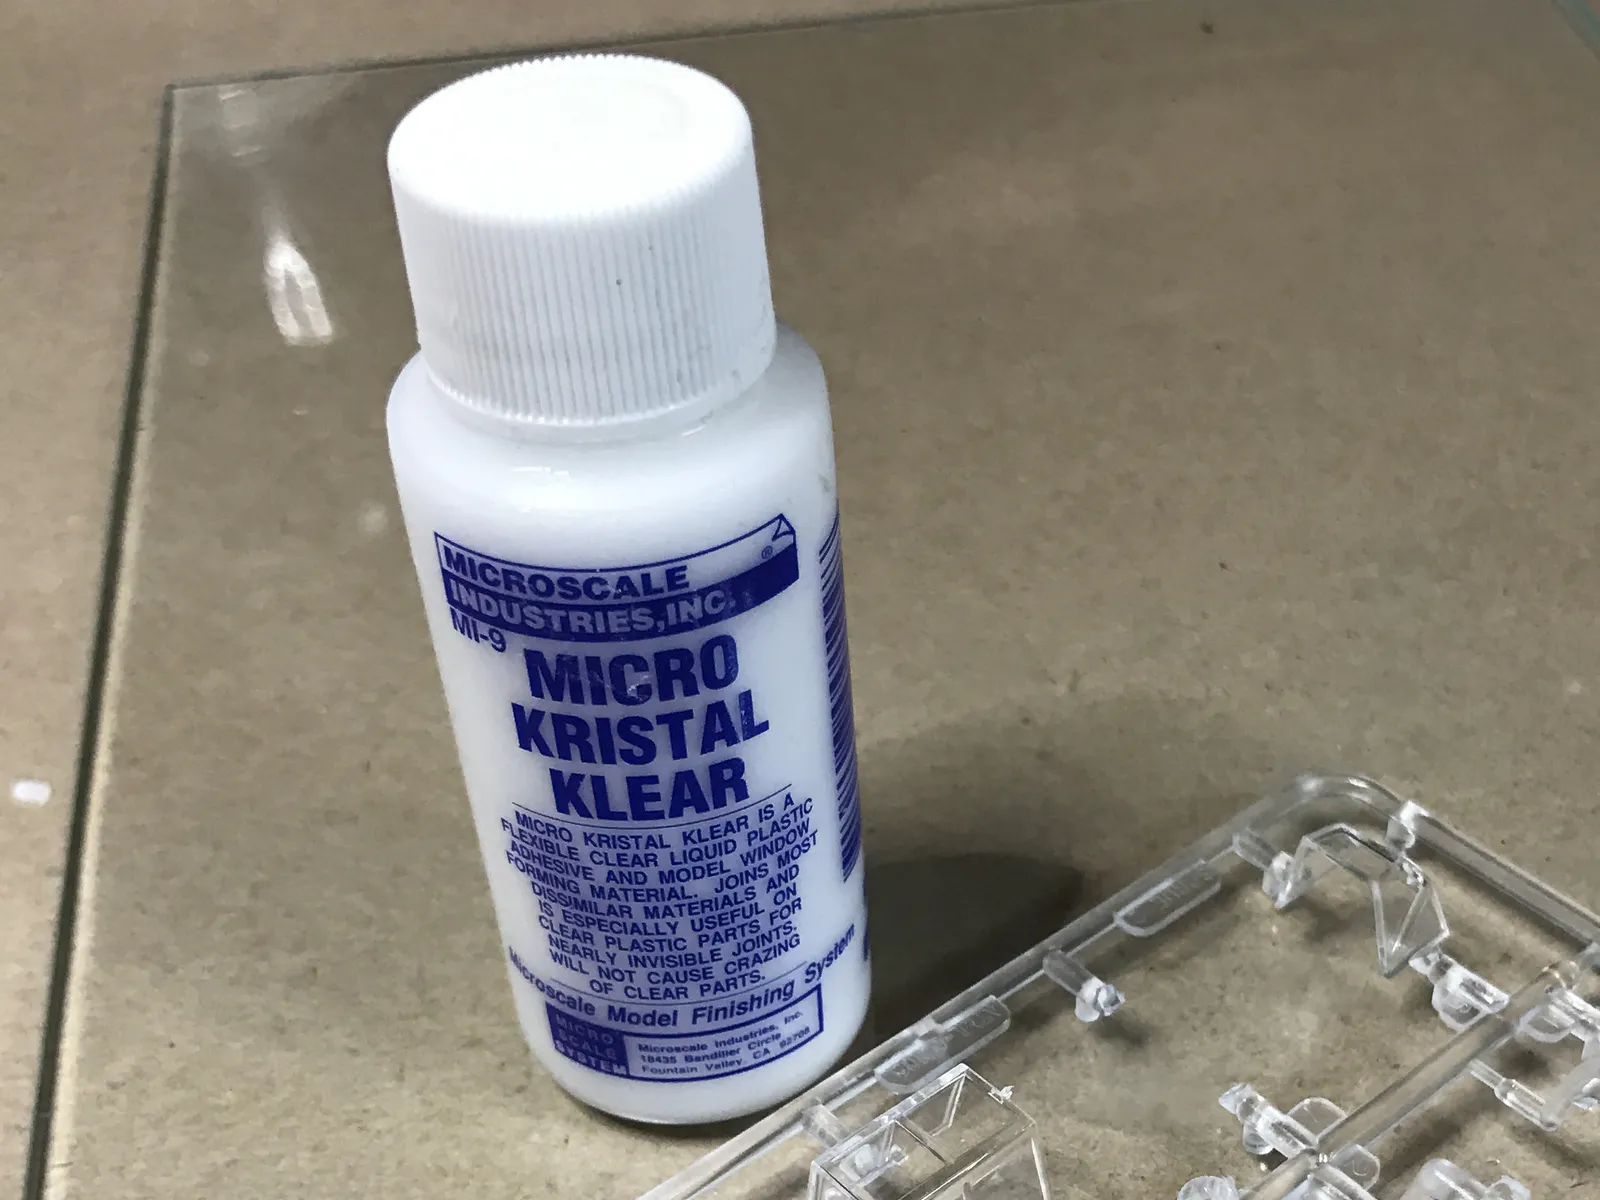
Micro Kristal Klear
This category of glue deserves a mention of its own. Micro Kristal Klear from Micro Scale is probably the best known, but the underlying idea is simple — a water-based, flexible adhesive that dries completely clear and won't damage transparent plastic. In practice it's not far removed from ordinary PVA white glue, and there are several alternatives worth knowing about: Humbrol Clearfix, Deluxe Materials Glue 'n' Glaze and Formula 560 Canopy Glue all work on the same principle and are widely used in the hobby.
The main use is bonding clear parts where other glues risk clouding or crazing the plastic. But there's a more creative application too — you can use it to build up an entire window from scratch, applying it in thin layers and letting each one cure before adding the next. If you've launched your canopy across the room with your tweezers, this might just save the project.
The main use is bonding clear parts where other glues risk clouding or crazing the plastic. But there's a more creative application too — you can use it to build up an entire window from scratch, applying it in thin layers and letting each one cure before adding the next. If you've launched your canopy across the room with your tweezers, this might just save the project.