No kit goes together perfectly. Gaps, seams and the occasional disaster are part of the process — here’s how to make them disappear.
Fill ‘er Up
The putty
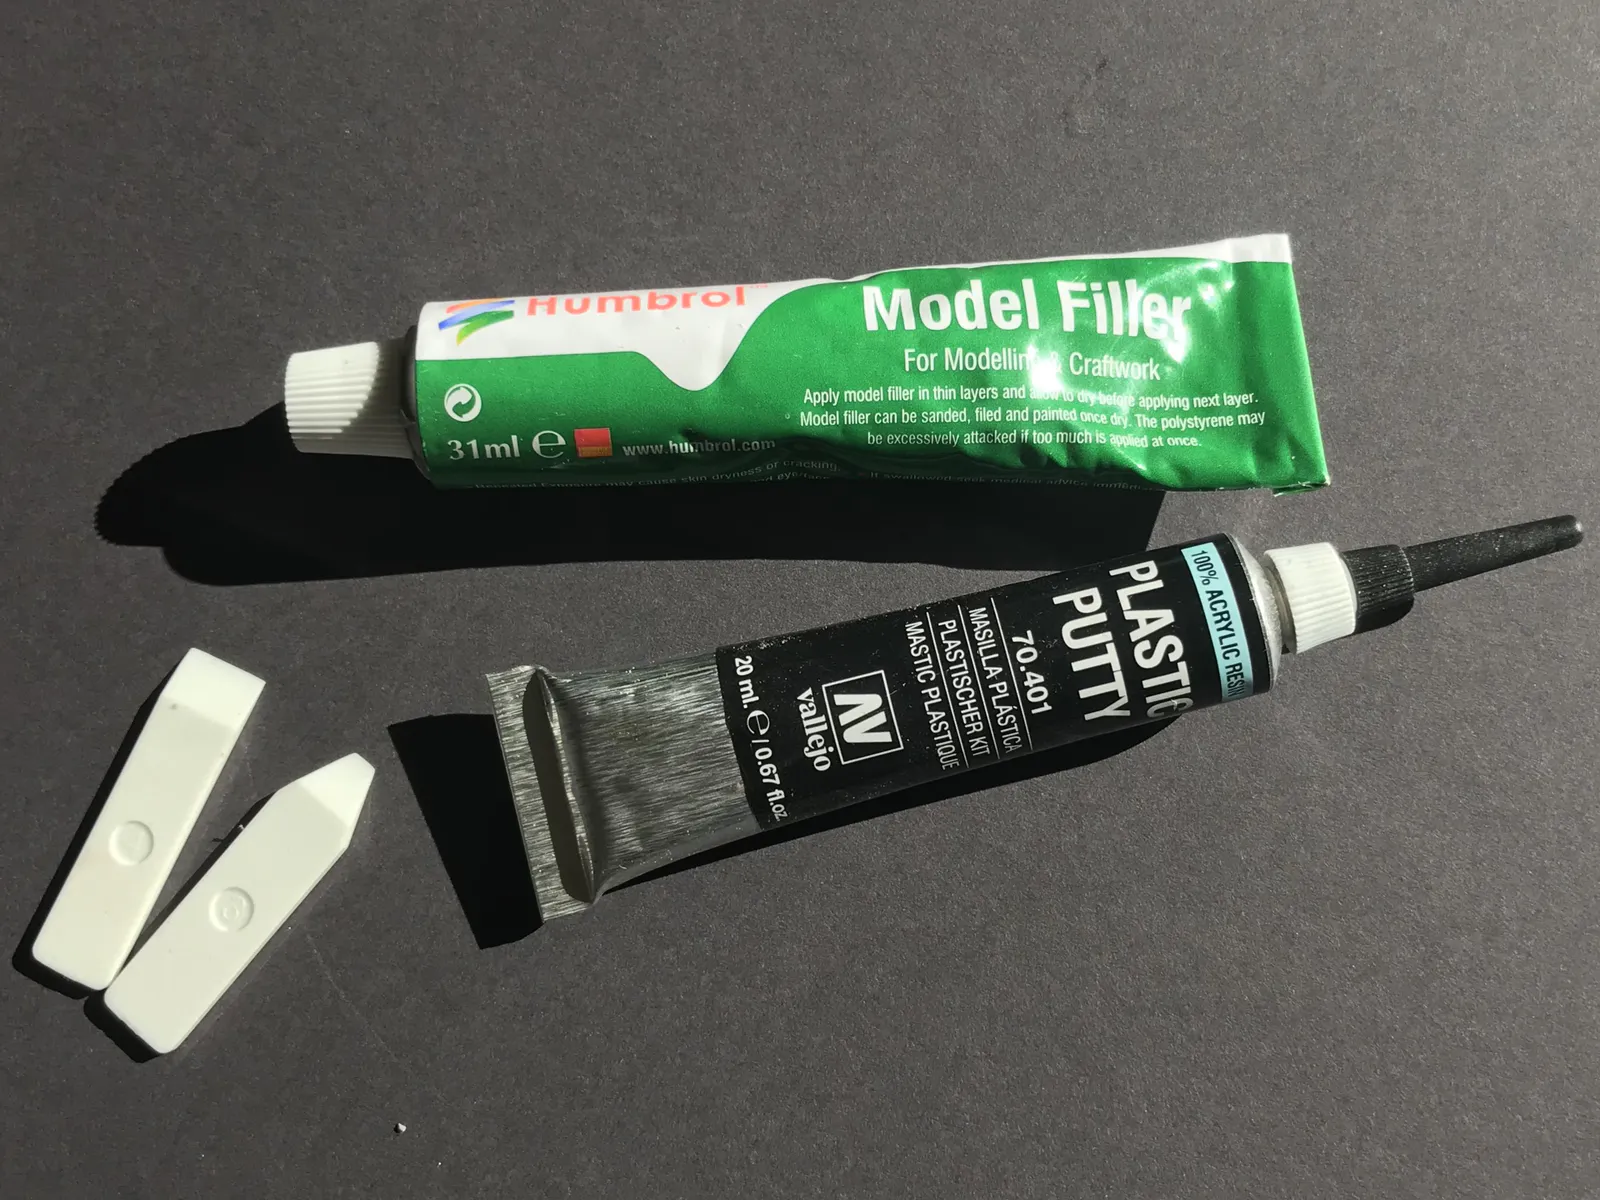
There's a lot of putty out there and it can be hard to know where to start. I use two kinds. The first is standard modelling putty — in my case from Tamiya or Humbrol — which is good for filling larger gaps or building up areas where needed. The important thing with these is patience: it can be tempting to start working on it when the surface feels hard, only to find it's still soft underneath. Leave it for a full day to be safe.
The second is Vallejo's Plastic Putty, which is slightly runnier and comes with a fine nozzle for applying it in controlled strings. It's perfect for seeping into smaller gaps along joints. You can use it for larger areas too, but where it really earns its place is in those tight seams where standard putty is hard to get into.
The second is Vallejo's Plastic Putty, which is slightly runnier and comes with a fine nozzle for applying it in controlled strings. It's perfect for seeping into smaller gaps along joints. You can use it for larger areas too, but where it really earns its place is in those tight seams where standard putty is hard to get into.
The tools
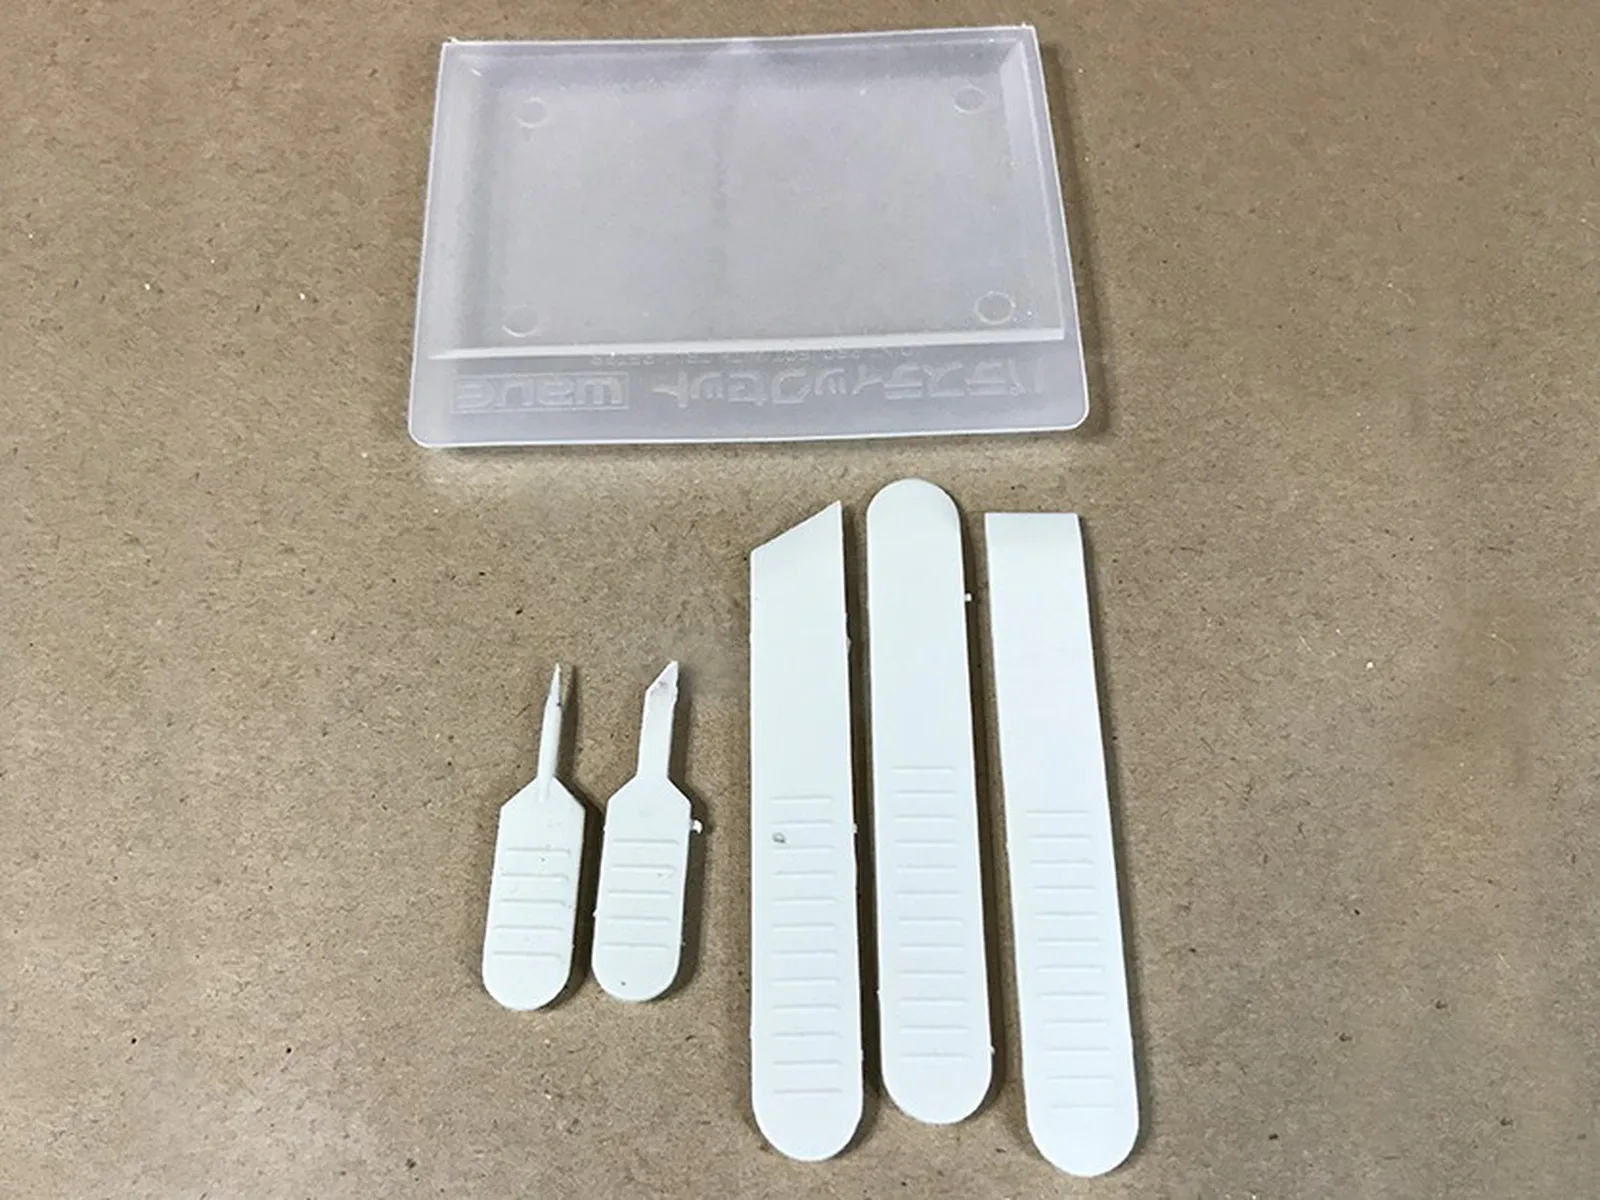
Putty can be worked with all kinds of things, but a tray to hold it and a set of differently shaped trowels are what I keep coming back to. Mine are made of soft, flexible plastic, which makes them easy to clean after use and gentle enough not to damage surrounding surfaces.
The when and how
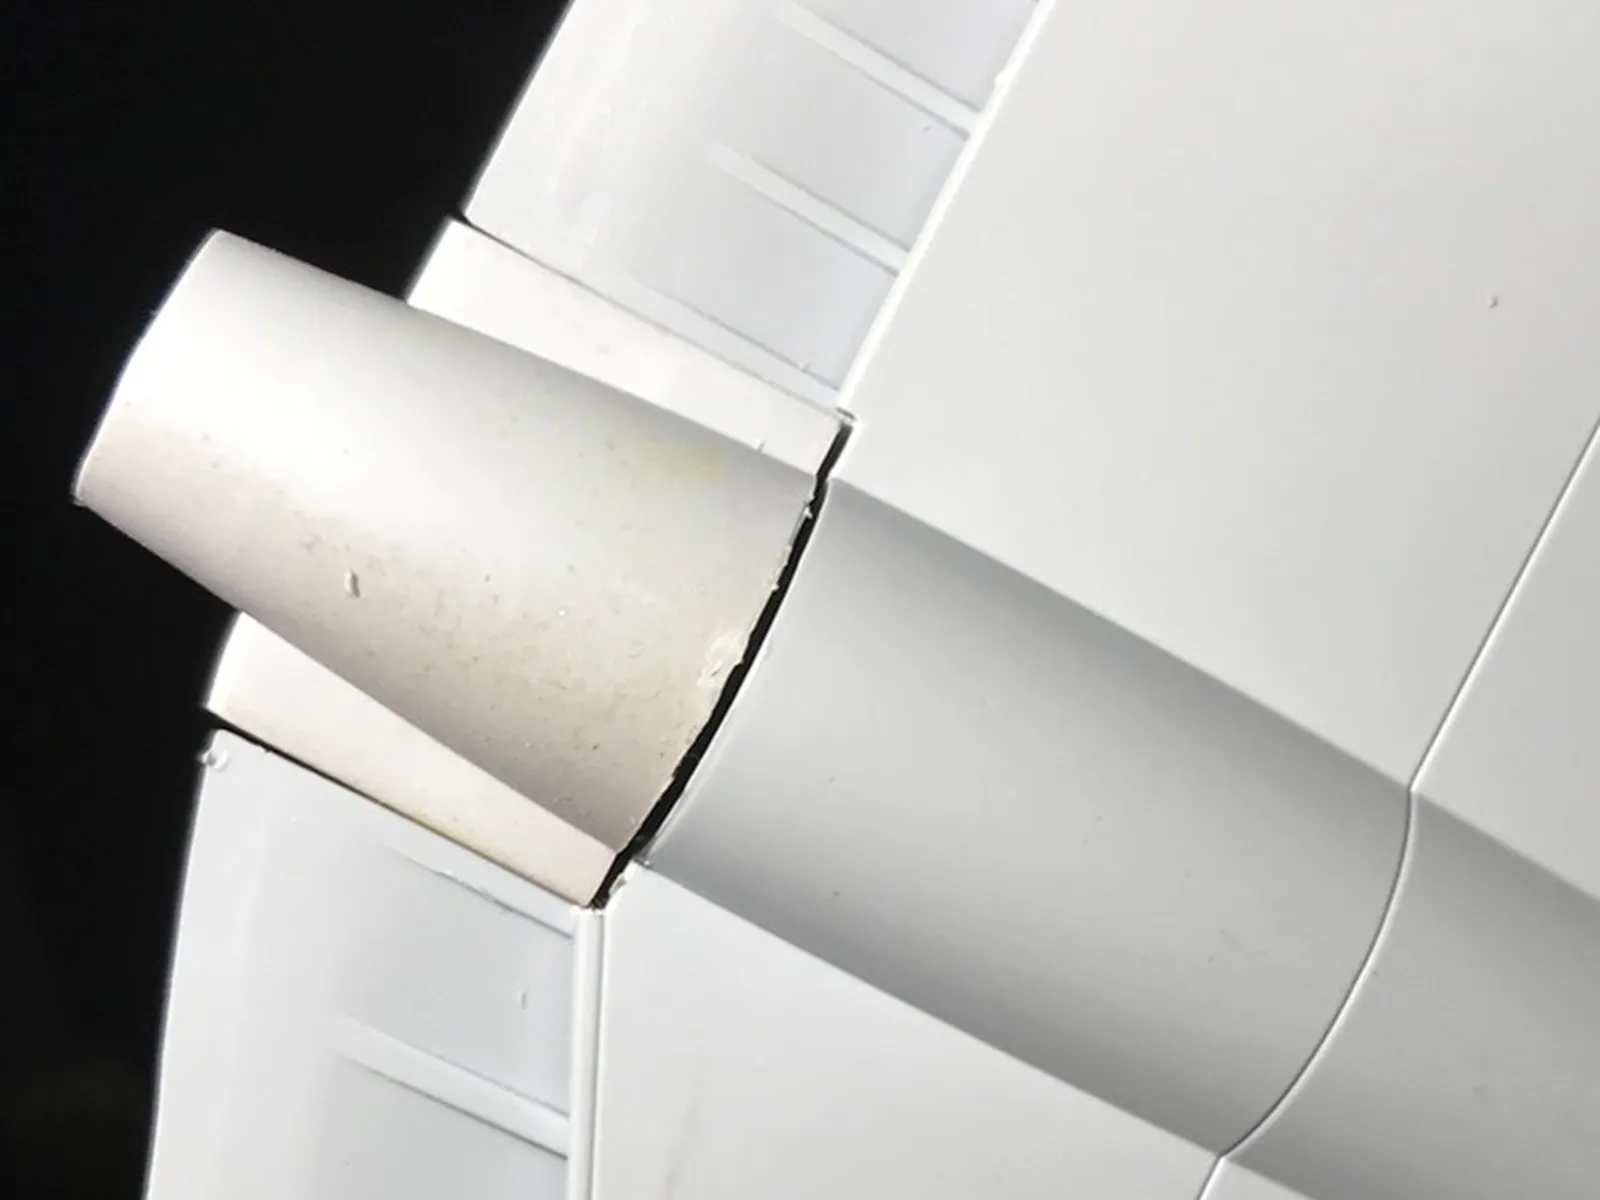
Gaps in joints are inevitable, and if you don't deal with them they'll ruin an otherwise well-built model. So deal with them.
For larger gaps, fill generously — it's always better to apply a little too much and sand it back than to underfill and have to go again. Try to keep it close to the area that needs fixing though, as there's no point creating extra work on surfaces that are already good. Work the putty in properly, making sure it penetrates the gap and that there are no air bubbles. Then leave it alone for a day or two.
When it's fully hardened, start with a file or sanding block to bring down the surface, then work through progressively finer grits until it matches the surrounding plastic. A coat of primer over the area will quickly show up anything you've missed. Keep going until you're satisfied.
The last step is to restore any panel lines or rivet detail that got filled or sanded away. Use a dull needle and, for straight lines, run it along the edge of a piece of tape to keep it true.
For smaller gaps along panel lines, Vallejo's Plastic Putty is the better choice. Apply a thin string along the gap and wipe away the excess with a damp cloth before it dries.
The examples
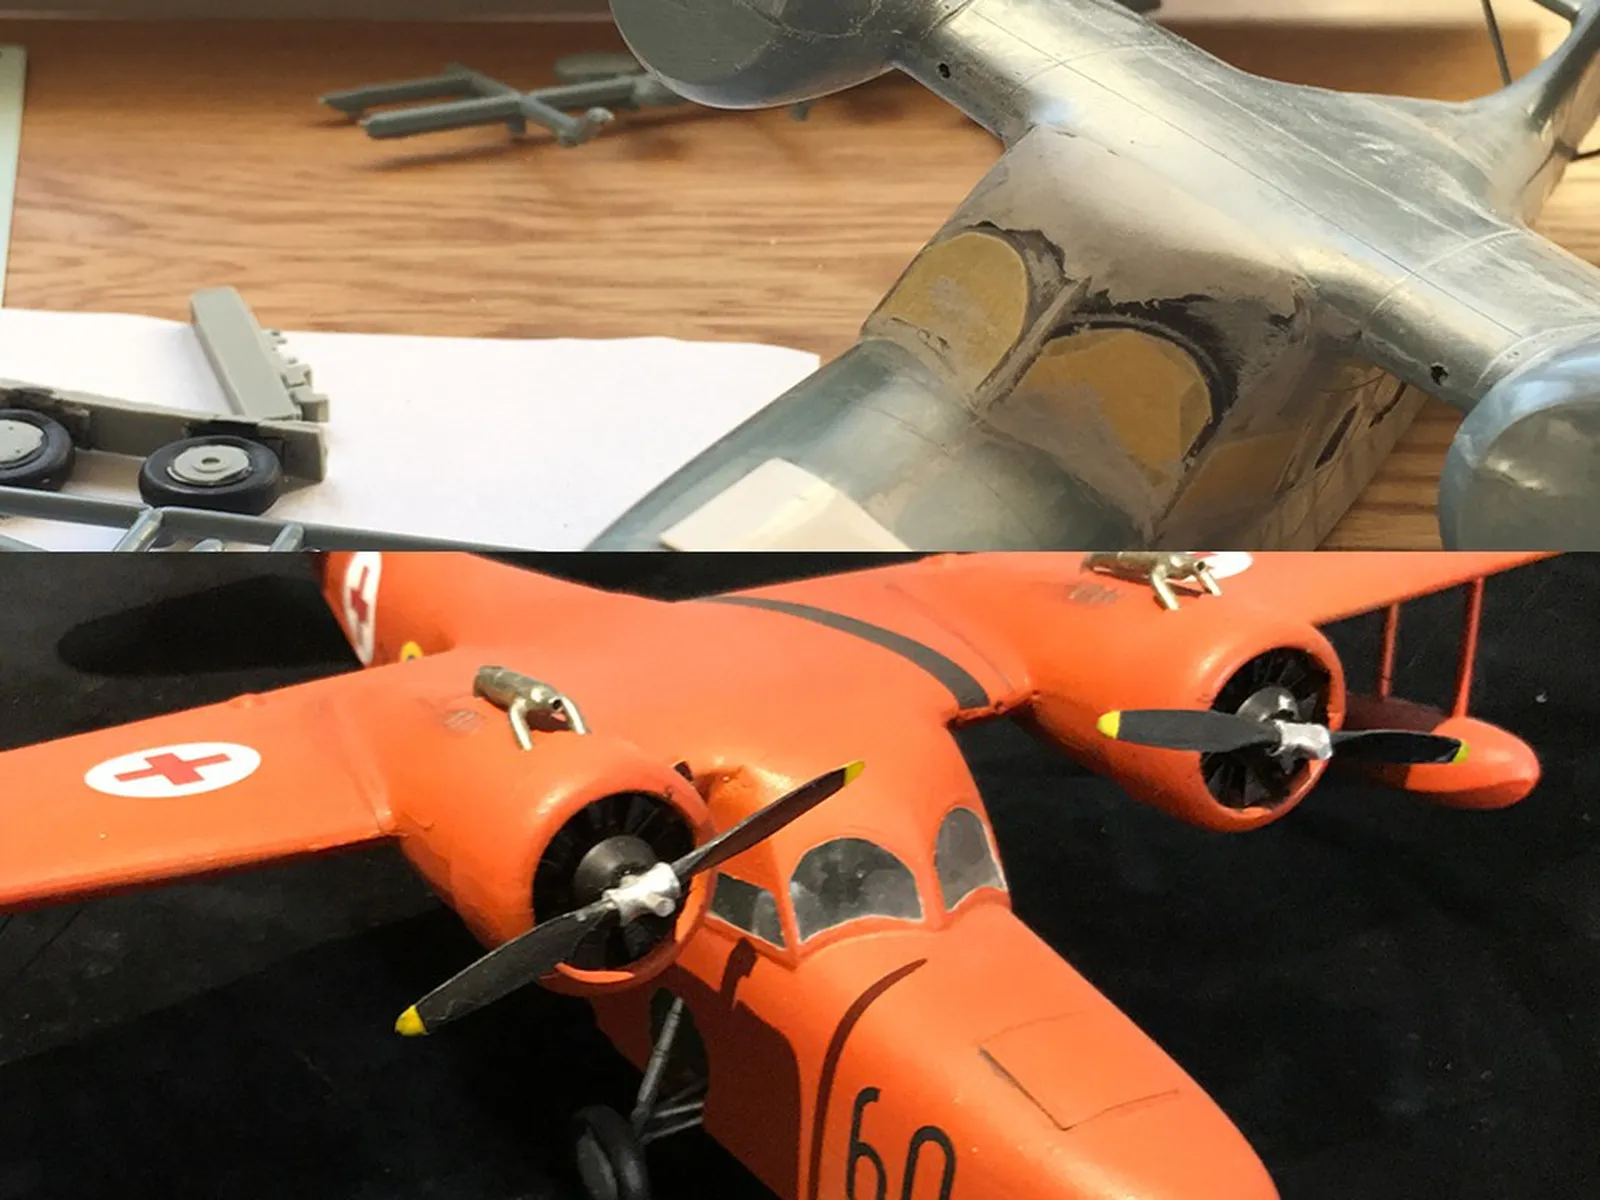
Sometimes putty goes beyond gap-filling. If a kit is significantly out of shape, or if you're building a conversion that requires changing the profile of a part, you may need to build up structure from scratch.
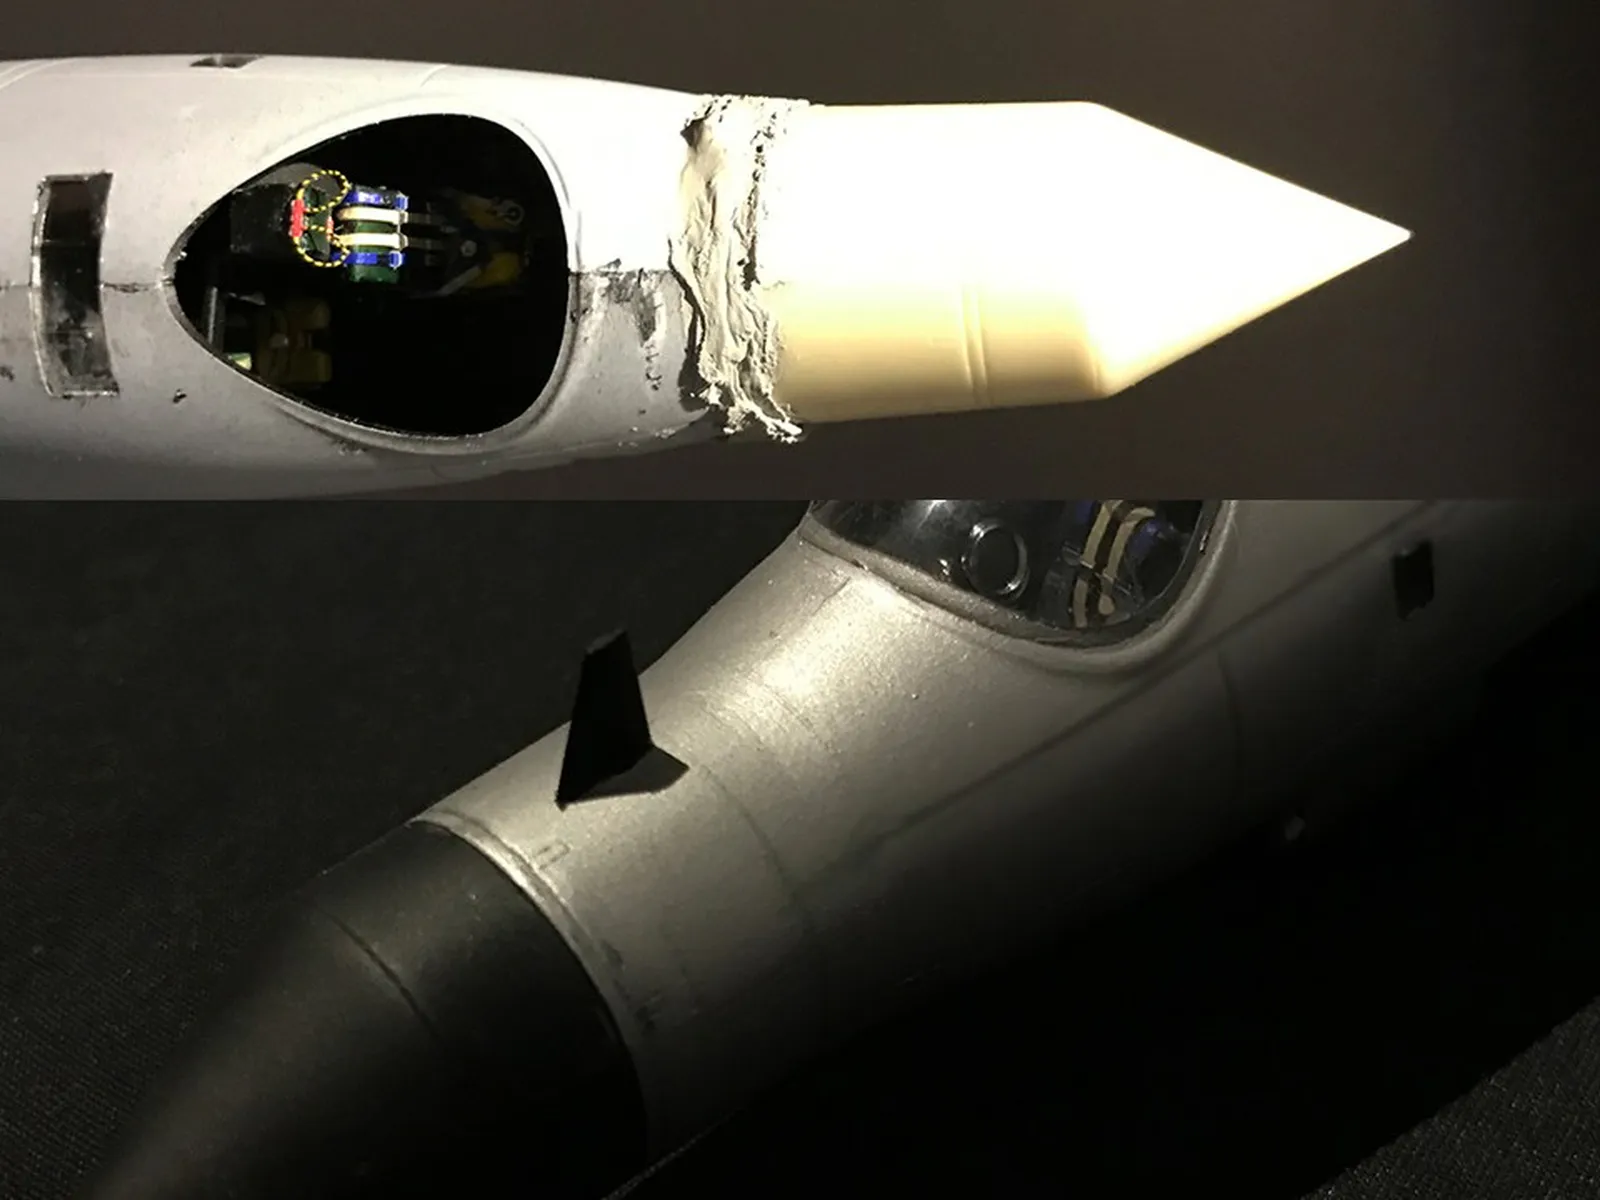
One example from my own bench: the canopy of a Grumman Goose was several millimetres too short, leaving a visible gap where it met the surrounding fuselage. The only solution was to build it up with putty and sand it back to the right profile.
Another was a Canberra where I fitted an aftermarket nose cone to model a variant used by the Swedish Air Force. Cutting away the original nose and grafting on the new one left all kinds of gaps and mismatches — a generous application of putty, followed by careful filing and sanding, brought it back to a smooth, seamless finish.
The Masked Hero
Painting is only half the battle — getting clean edges between colours is where patience really pays off. Here’s what I’ve learned about masking.
The tape
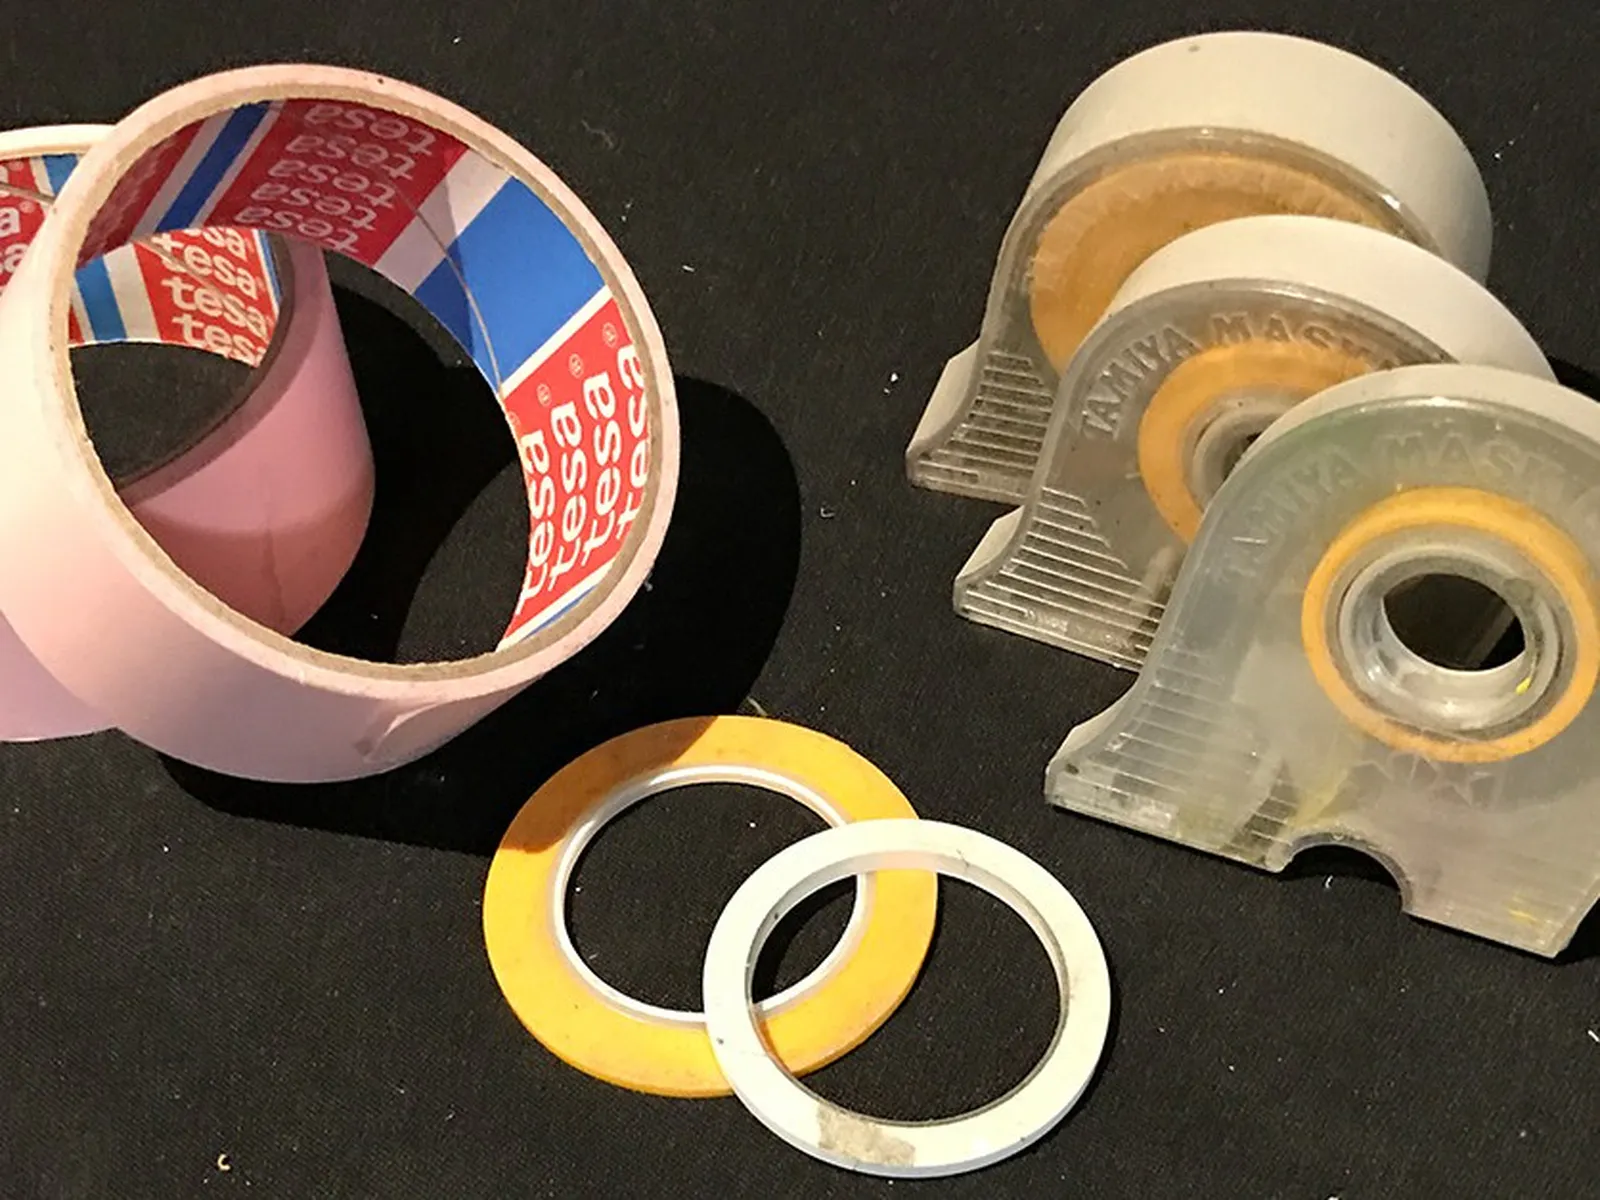
Masking tape for hobby use comes in several varieties and it's worth knowing the differences. For most tasks I use Tamiya's masking tape, which comes in different widths in a convenient dispenser. It's gentle on painted surfaces, which matters more than you might think — especially with acrylic paint. For covering larger areas I use a wider precision tape from Tesa, bought at a hardware store. It covers more ground and is even gentler on the paint beneath.
For tight curves or very narrow areas there are flexible masking tapes, also from Tamiya, available in widths down to 2mm. These bend well around reasonable curves while still adhering cleanly. The one thing to watch is that they're slightly thicker than standard tape, which can leave a small paint ridge along the edge if you're not careful when removing them.
For tight curves or very narrow areas there are flexible masking tapes, also from Tamiya, available in widths down to 2mm. These bend well around reasonable curves while still adhering cleanly. The one thing to watch is that they're slightly thicker than standard tape, which can leave a small paint ridge along the edge if you're not careful when removing them.
The liquid mask
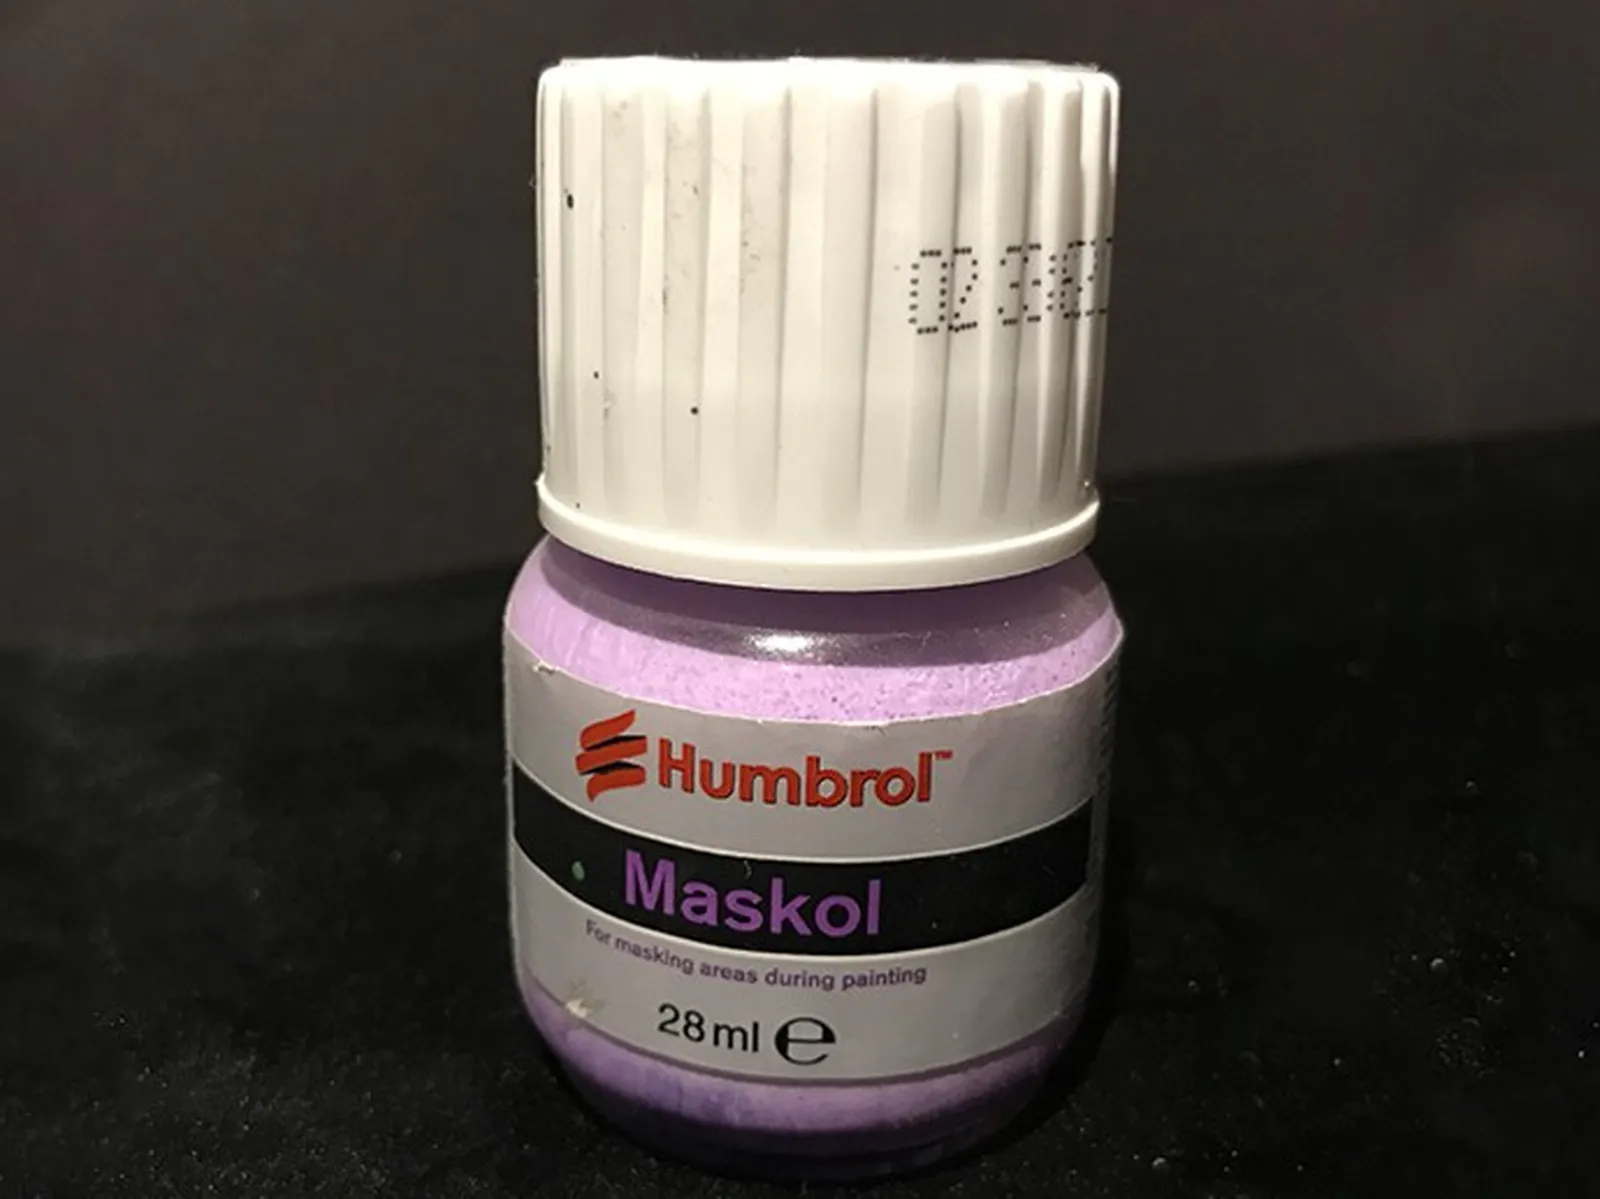
Where tape struggles — on bulging or complex curved surfaces where it tends to fold and lift — liquid mask is the answer. Humbrol's Maskol is a good example. You brush it on, let it dry, and paint over it. When you're done it peels off cleanly.
The slightly unnerving thing about it is that it dries to an almost invisible coat, which makes it hard to be certain you've covered everything properly. Work methodically and don't rush it. When it's time to remove it, it peels away easily and leaves the surface beneath untouched.
The slightly unnerving thing about it is that it dries to an almost invisible coat, which makes it hard to be certain you've covered everything properly. Work methodically and don't rush it. When it's time to remove it, it peels away easily and leaves the surface beneath untouched.
The masking putty
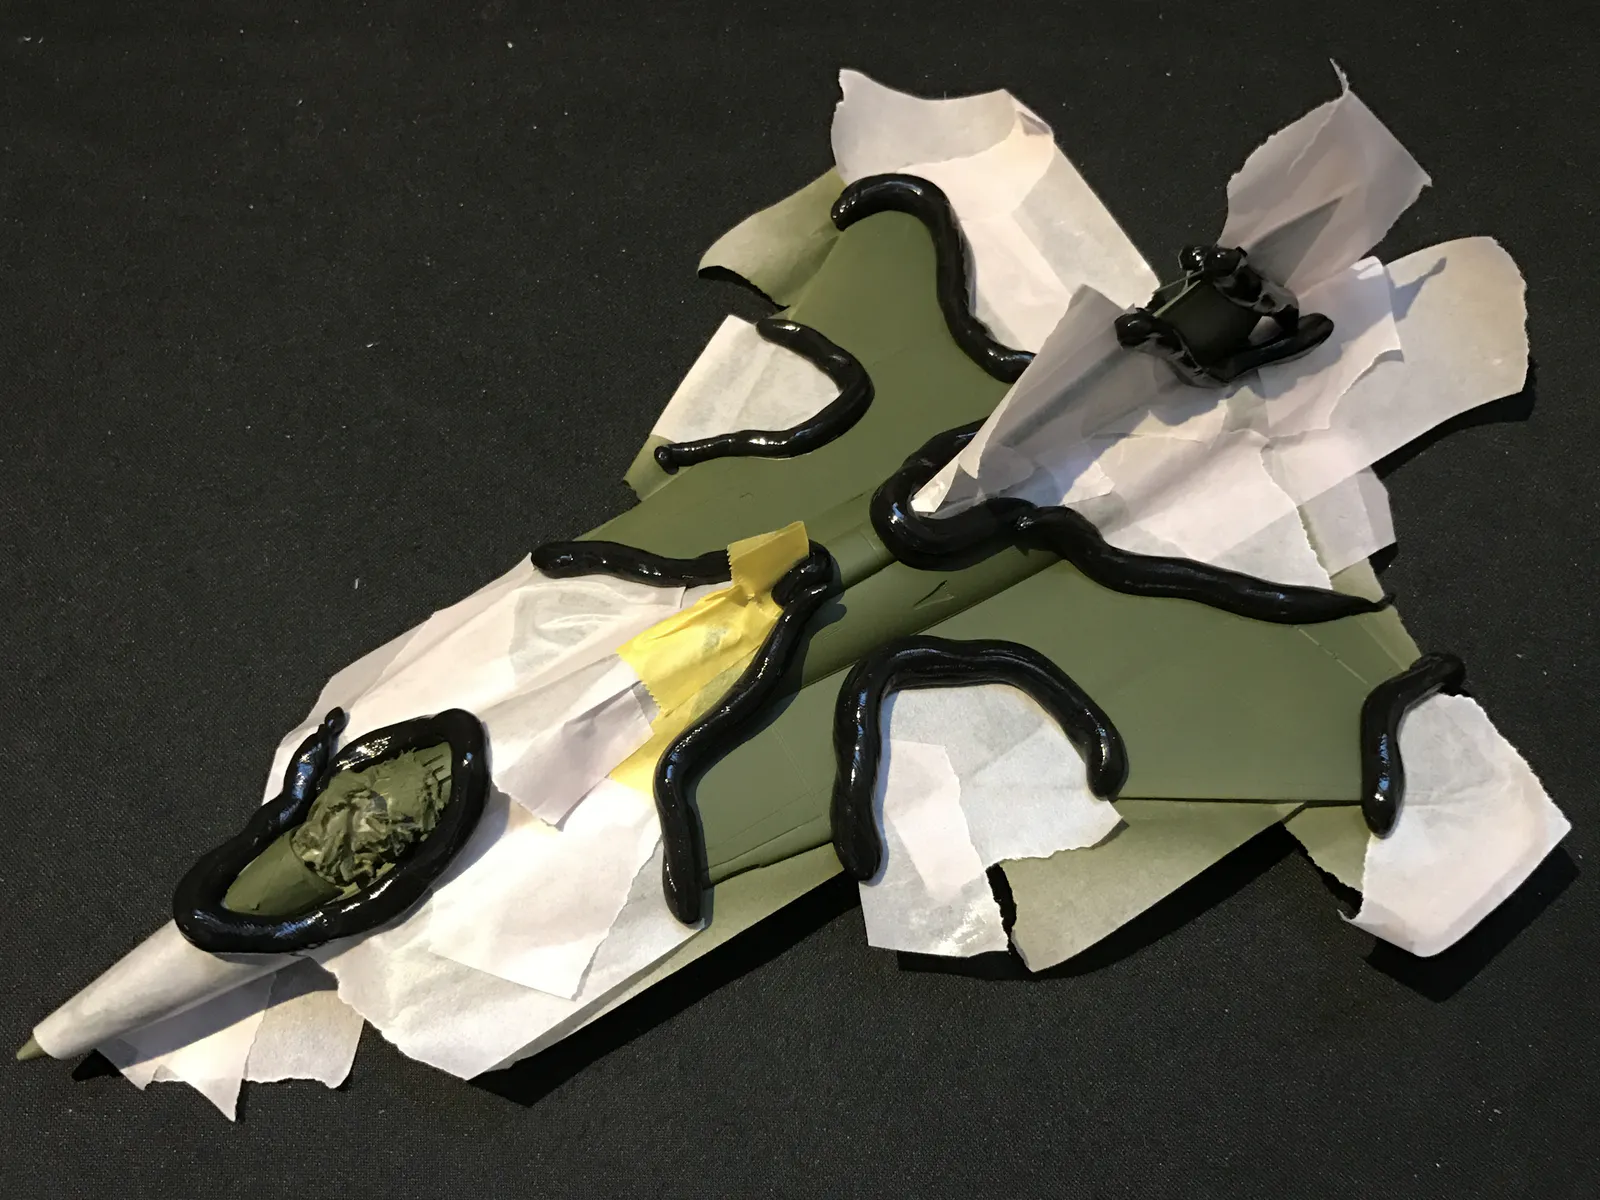
Putty might seem like an odd masking material, but it has a specific and very useful purpose. Most camouflage schemes on military aircraft and vehicles have soft, indistinct edges between colours — because in real life they were sprayed on with large airbrushes. Recreating that effect with tape alone is difficult, as tape gives you a hard edge.
The solution is to line the edges of your masked area with thin rolls of tack putty and paint from directly above. The colour fades out naturally at the edges, giving exactly the right softness. You can see in the picture that I'm using dedicated masking putty — but I've since learned that ordinary tack putty works just as well, and is easier to handle. It's what I use today.
The solution is to line the edges of your masked area with thin rolls of tack putty and paint from directly above. The colour fades out naturally at the edges, giving exactly the right softness. You can see in the picture that I'm using dedicated masking putty — but I've since learned that ordinary tack putty works just as well, and is easier to handle. It's what I use today.
The how
Masking can be straightforward or it can test your patience — it depends on what you're trying to achieve. Simple panel-aligned colour separations are easy enough. Camouflage schemes are where it gets more involved, and where good reference pictures become essential. Paint instructions aren't always accurate, but then again — who's going to hold you responsible for a slightly imperfect pattern, as long as it looks good?
When using an airbrush, masking everything that shouldn't get paint is critical. It takes only a moment of misdirection to do damage that takes much longer to fix. I always err on the side of masking too much rather than too little, and I make sure the tape is adhering properly all the way along every edge — paint creeping under the tape is one of the most dispiriting things to discover when you unmask.
It's also good practice to leave as many separate parts off the model as possible until after painting — propellers, landing gear, pitot tubes. They get in the way, they're prone to breaking during masking, and they're usually a different colour anyway. Just make sure you've thought through how they'll attach afterwards. Realising too late that a landing gear can't be fitted without surgery is not a good moment.
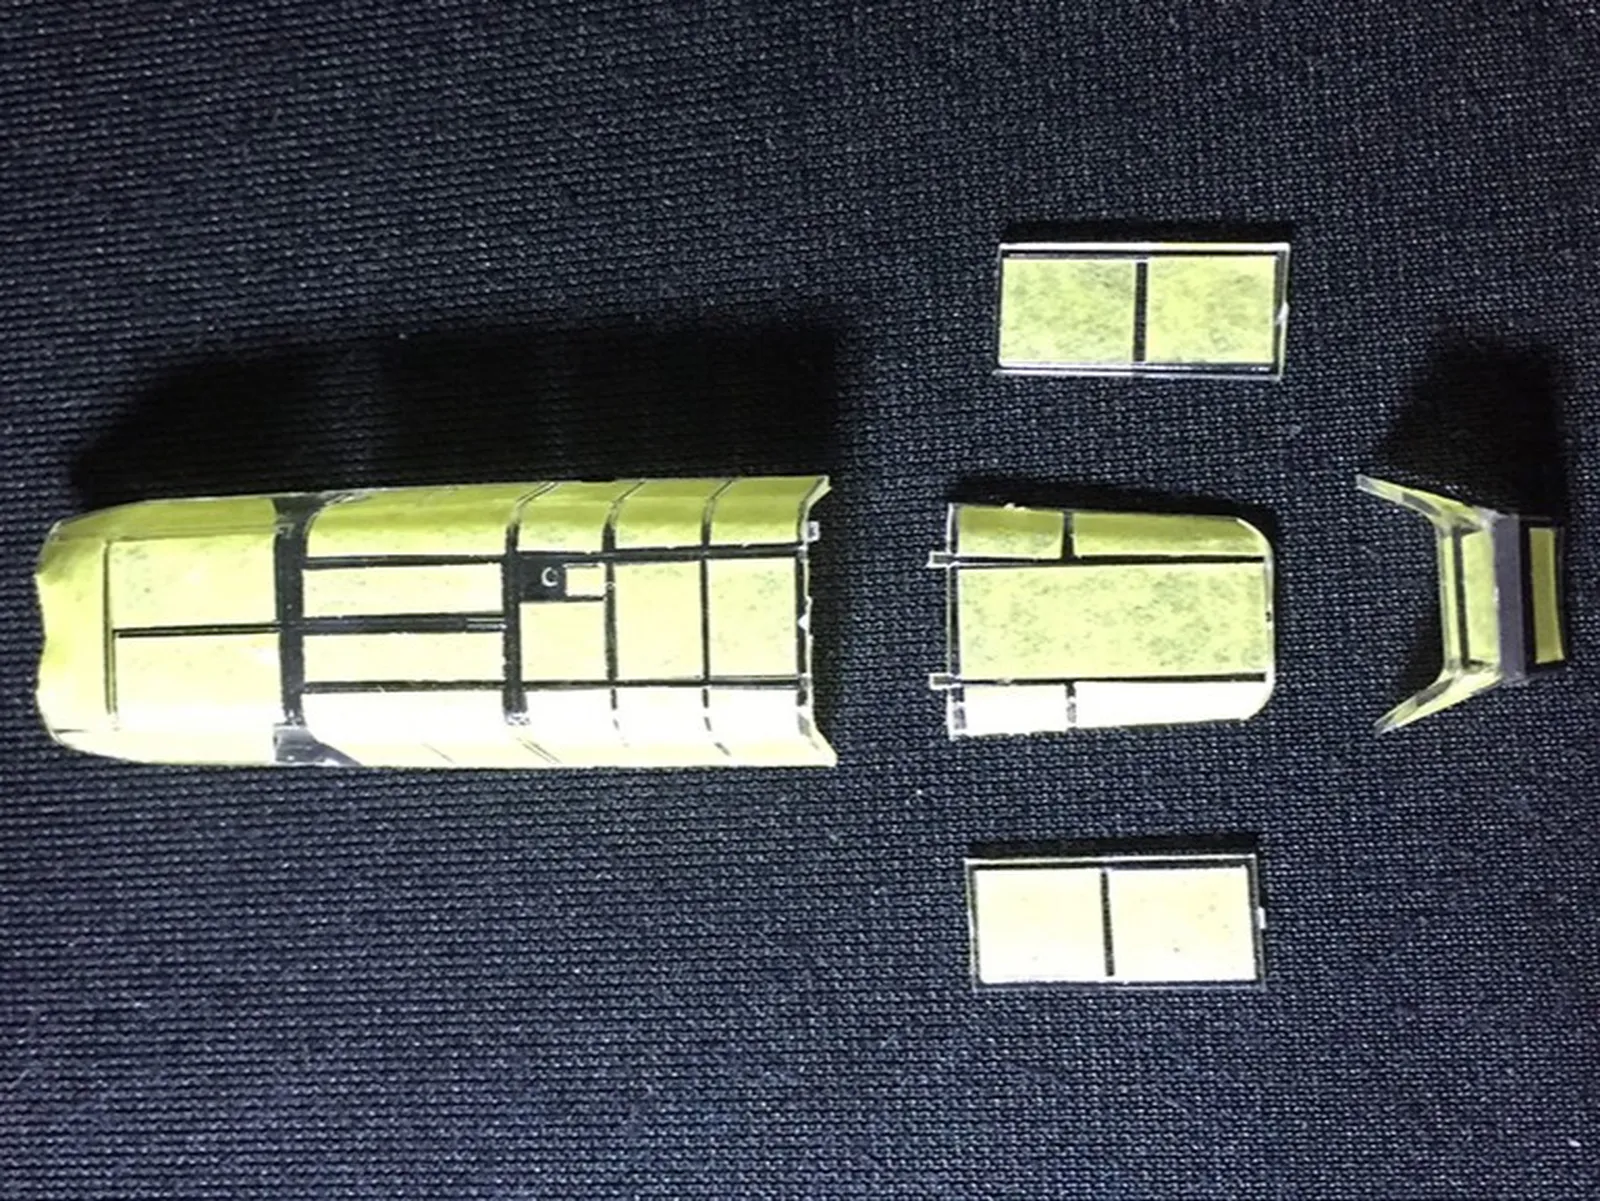
Canopies deserve special mention. I prefer to cement them in place before painting, as the join is otherwise very hard to finish neatly. Mask carefully, leaving the frames exposed for painting, and fill the rest of the glazed area with liquid mask. If you don't have a ready-made mask, tape over the canopy and cut carefully along the frames with a scalpel — holding a light behind it helps you see the lines through the tape.
When using an airbrush, masking everything that shouldn't get paint is critical. It takes only a moment of misdirection to do damage that takes much longer to fix. I always err on the side of masking too much rather than too little, and I make sure the tape is adhering properly all the way along every edge — paint creeping under the tape is one of the most dispiriting things to discover when you unmask.
It's also good practice to leave as many separate parts off the model as possible until after painting — propellers, landing gear, pitot tubes. They get in the way, they're prone to breaking during masking, and they're usually a different colour anyway. Just make sure you've thought through how they'll attach afterwards. Realising too late that a landing gear can't be fitted without surgery is not a good moment.
Canopies deserve special mention. I prefer to cement them in place before painting, as the join is otherwise very hard to finish neatly. Mask carefully, leaving the frames exposed for painting, and fill the rest of the glazed area with liquid mask. If you don't have a ready-made mask, tape over the canopy and cut carefully along the frames with a scalpel — holding a light behind it helps you see the lines through the tape.
Signed, Sealed, Delivered
Decals are one of the last steps — and one of the most satisfying. Get them right and they look like they were painted on. Here’s how.
The tools
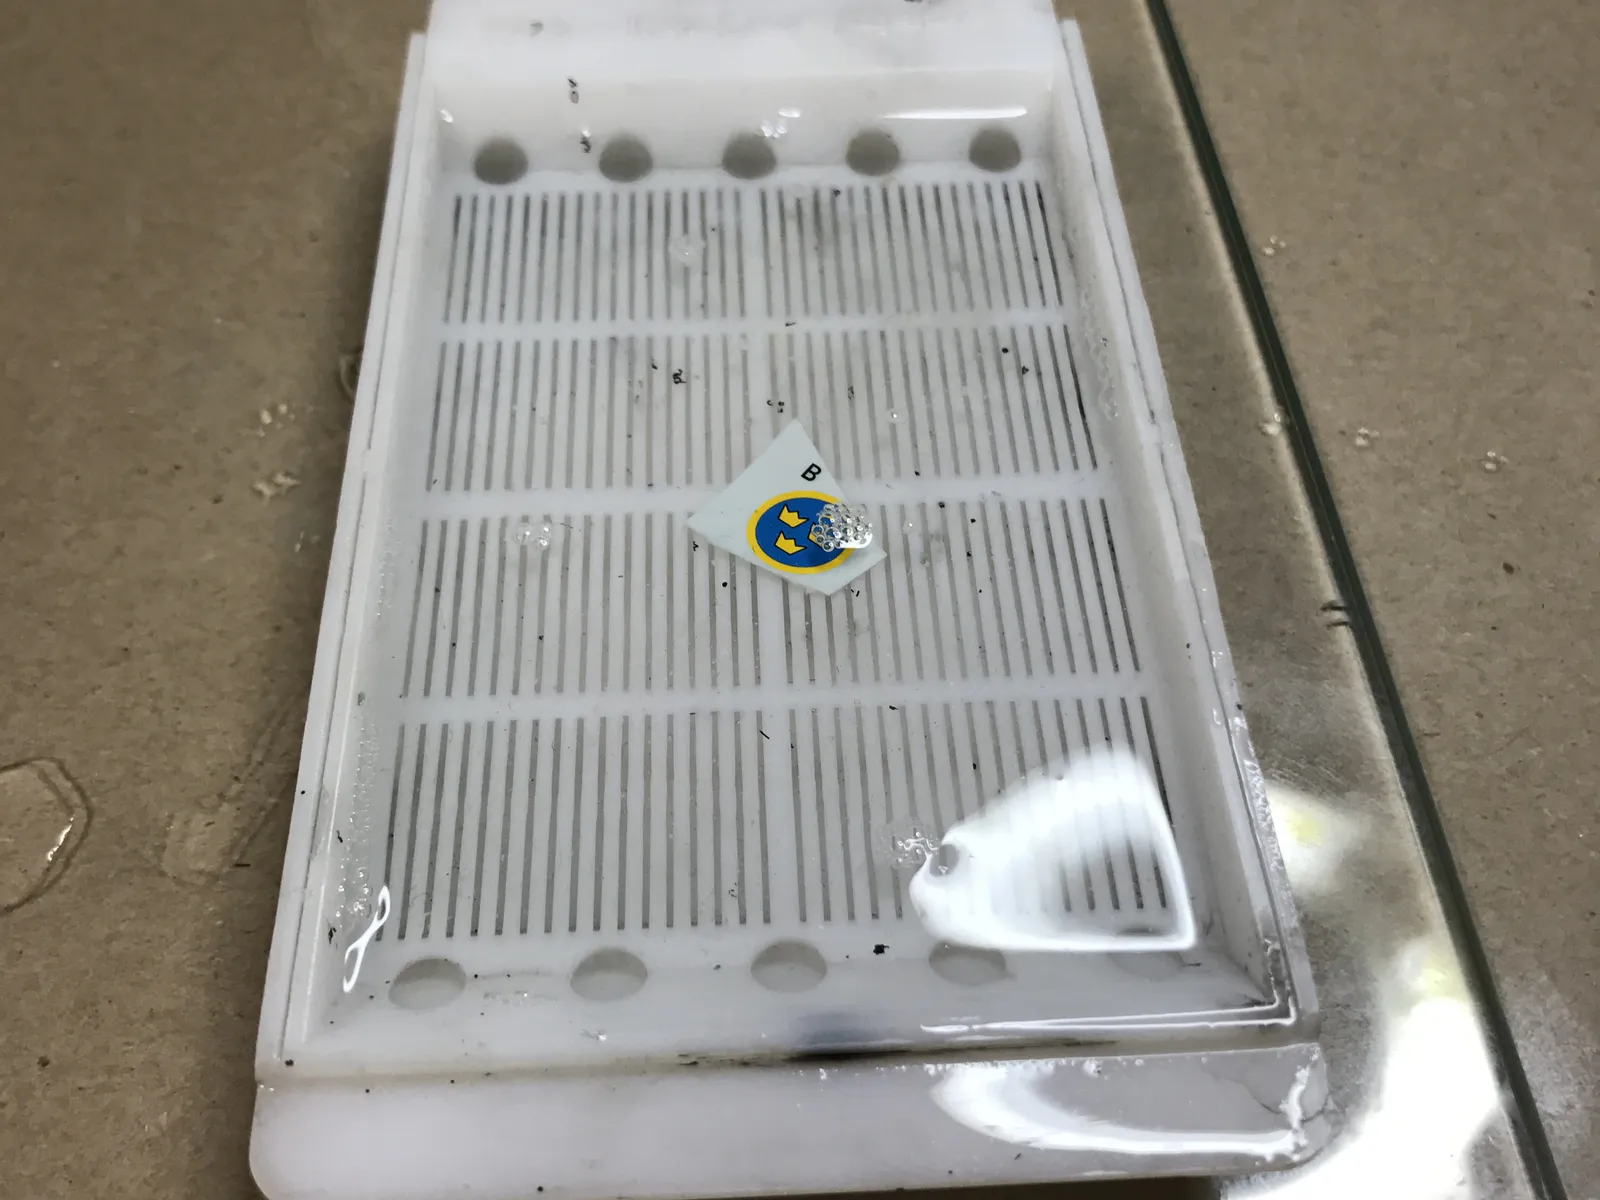
The essentials are simple. You need a tray of lukewarm water — if it cools down don't worry, it just takes a little longer for the decal to loosen. A drop of dish soap in the water helps by breaking the surface tension and making the decal easier to slide. Any tray will do, though Trumpeter make a dedicated decal tray that's quite practical.
Beyond that, a pair of scissors or a knife to cut out individual decals from the sheet, and a stiff brush for handling them on the model surface.
Beyond that, a pair of scissors or a knife to cut out individual decals from the sheet, and a stiff brush for handling them on the model surface.
The liquids
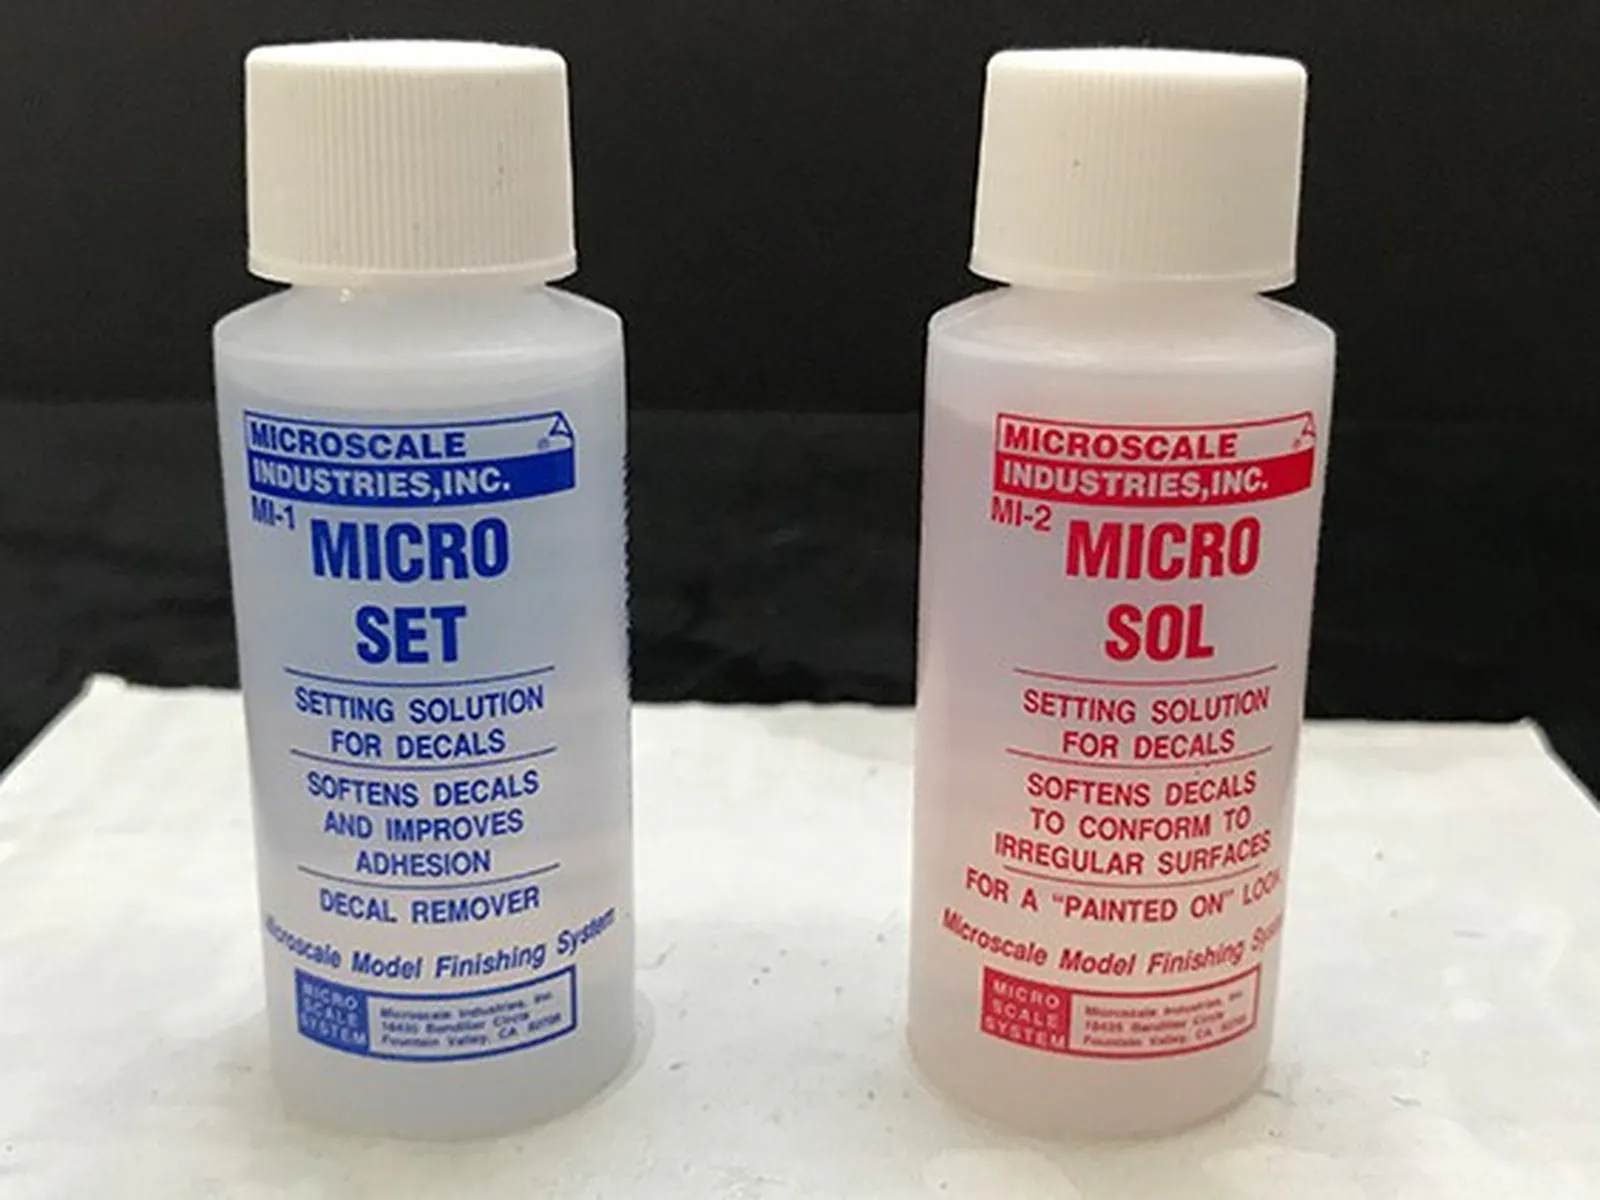
Water is the obvious one, but there are two more worth knowing about. My favourites are Micro Set and Micro Sol from Microscale Industries. They do different things. Micro Set improves the adhesion of the decal to the surface. Micro Sol softens the decal itself, allowing it to conform to uneven surfaces — panel lines, rivets, anything that would otherwise cause the decal to wrinkle or lift at the edges. More on how to use them in the next section.
The how
If you've read the painting section you'll know that decals adhere best to a gloss surface — so a coat of gloss varnish before you start is a good prerequisite. Any matte or satin finish you want can be applied afterwards.
Cut out the decals individually and handle them one at a time. Don't soak the entire sheet at once — there are too many ways that can go wrong.
Place each decal in the water for a few seconds until the paper is saturated, then set it aside on a flat surface until the decal begins to loosen. If you're using Micro Set, apply it to the model surface now with a brush. Be aware that it makes positioning trickier, so try to get the decal close to its final position before it touches down. Slide the decal off the paper and onto the model, holding the paper against the surface and carefully transferring it across.
Adjust the position with a scalpel — fingers tend to pick the decal up rather than move it, and cotton buds can be similarly unhelpful with smaller decals. If it gets stuck in the wrong place, a few drops of water will free it up again.
Once in position, dab firmly, but carefully, with a stiff brush to force out any air bubbles from underneath — pay particular attention to any transparent areas of the decal, where trapped air will be most visible.
If the decal needs to conform to panel lines or other surface detail, this is where Micro Sol comes in. Make sure the decal is exactly where you want it, then apply Micro Sol with a brush and leave it. It will partially dissolve the decal, allowing it to sink into the surface detail. If one application isn't enough, repeat — but work gently and one step at a time. Overdoing it will cause the decal to come apart.
Finally, once all decals are in place and fully dry, seal everything with a coat of varnish. This protects the decals, ties them into the overall finish, and gives them that painted-on look.
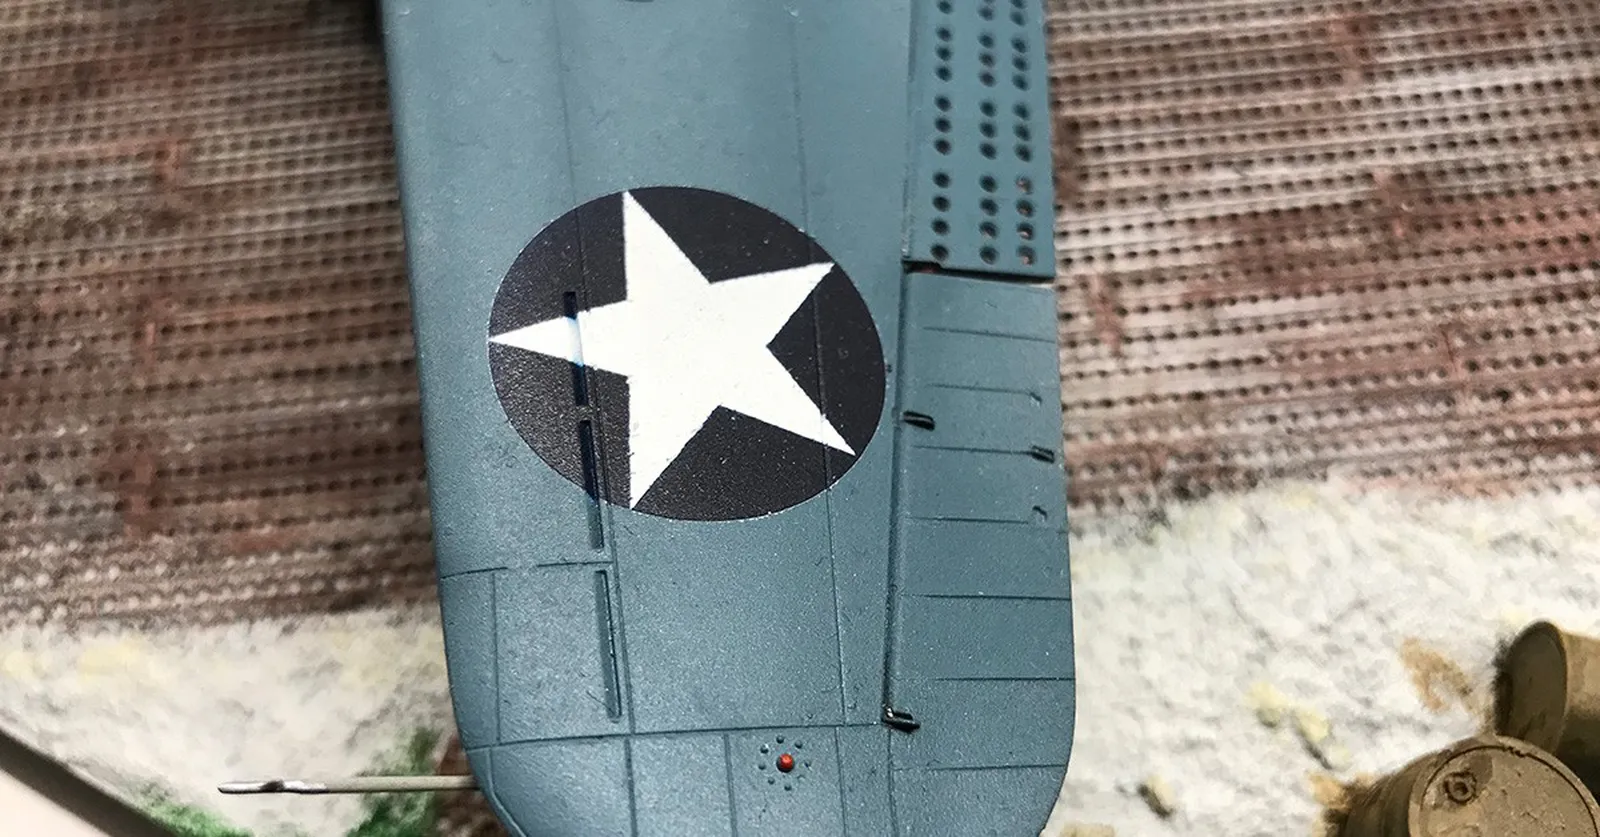
A last note
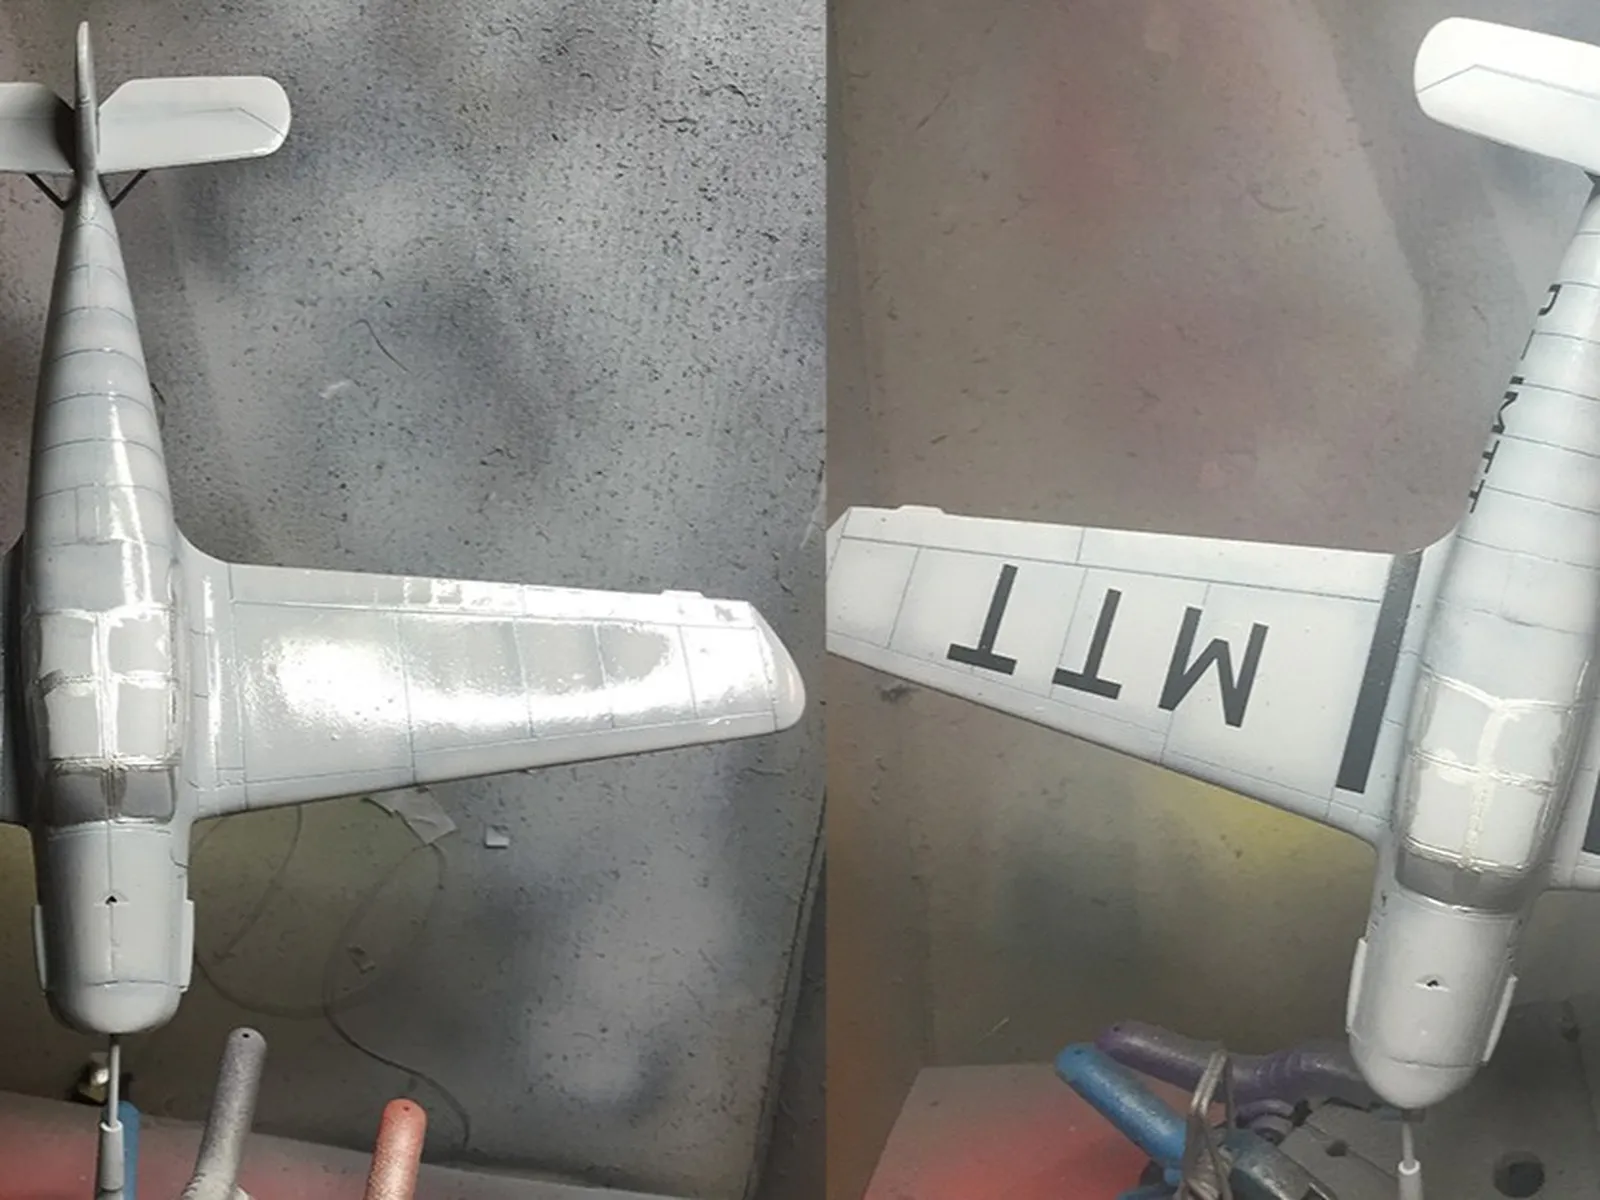
Lately I've started experimenting with paint masks as an alternative to decals for some markings. After market masks are available for a growing range of subjects, and they make particular sense where the surface is challenging — a curved fuselage or a complex compound shape where decals struggle to lie flat.
They're more demanding than decals. Getting them positioned correctly takes patience, and working through multiple colours means repeated masking and unmasking. But the result — paint applied directly to the surface, conforming perfectly to every contour — is hard to argue with.
They're more demanding than decals. Getting them positioned correctly takes patience, and working through multiple colours means repeated masking and unmasking. But the result — paint applied directly to the surface, conforming perfectly to every contour — is hard to argue with.